Playing with the (Pyro)cat

I guess that at some point in our photographic lives we each of us find ourselves searching for that magic bullet; the developer/film combination that works for all occasions. A never-fail combo that produces consistency and quality without fail. Well, having been searching on and off for nigh on fifty years I’ve finally come to the conclusion that it is a mythical combination. I say finally, I probably recognised this fact many moons ago, but it hasn’t stopped me experimenting.

Lomo LC-A 120
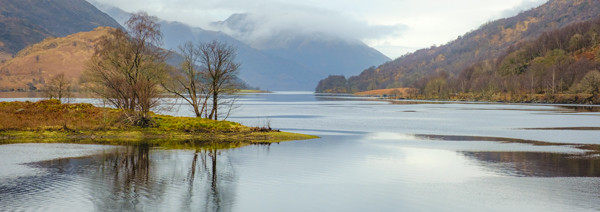
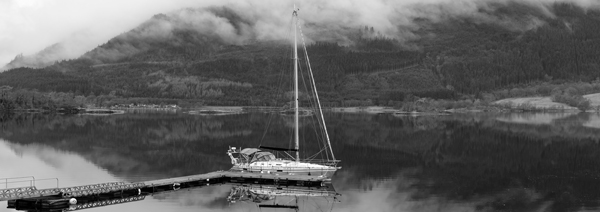
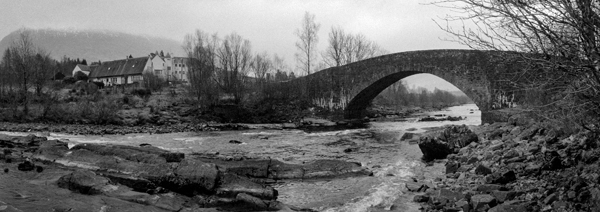
(all images Fomapan 100 | Pyrocat-HD)

I am by nature a photographic butterfly, enjoying trying different films, cameras, developers, techniques etcetera. However, my most recent experiment has been born partly of a desire to reduce costs. None of us indulge our passion for film photography because it’s cheap, on the contrary, film photography can be a real money-pit hobby, but equally none of us can have failed to notice that costs have been rising steeply over the last couple of years. I know that some will argue that relative to average earnings that film is “cheaper” than ever but do take into account that household bills and general living expenses probably account for a larger proportion of that average wage than ever before too.

So, to get back on-topic, I’ve been looking again at smaller format Fomapan films. I regularly use both Fomapan 100 and to some degree Fomapan 200 in sheet film with good results but not so much in medium format 120 roll film and very rarely in 35mm. My go-to 120 films have been Ilford FP4+ and HP5+ and when I’m feeling very flush Kodak Tri-X. Ilford FP4+ for example was the sole medium format film stock I took on my recent Scottish trip.

Lomo LC-A 120

As I’ve mainly been using 120 film so far this year it seemed logical to give medium format Fomapan 100 film a proper try. As ever, I started by trawling the worldwide web and also, most importantly, gaining the views of my peers. You mustn’t believe everything you read or see online (I’m looking at YouTube “influencers” who shoot one roll of film, send it to a lab and then pronounce on the films merits or otherwise – yes, my old hobby horse) but rather we should use the information to guide further research taking careful note of the information’s provenance. There’s a lot of good stuff out in the wilds of t’internet and you just need to be thoughtful in how you interpret it. Sorry, I digressed again!

“The trouble with facts on the internet is that you never know if they are genuine”

Winston Churchill (honest!)

Chroma 617 | Schneider 90mm

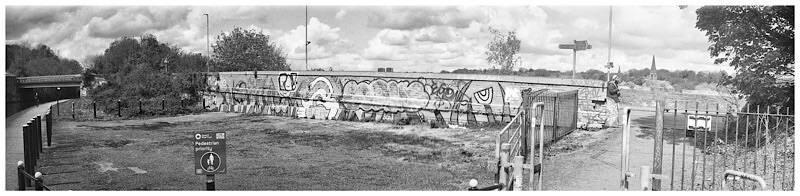
It was a chance conversation however with Andrew B that took my attention towards Pyrocat-HD and from there on to the current Fomapan 100/Pyrocat-HD experiments. Thus far I’ve exposed and developed six rolls in a variety of cameras. The Chroma 617, Rollei Magic, RSS 617 pinhole camera and of course Jon’s LC-A 120.

Now, six rolls is not in my opinion a fair test of the combination and I’m intending using this film with this developer for a good few months yet before coming to any conclusions. However, it’s probably worth sharing my first impressions at this stage, after all six rolls and four cameras on five different occasions in four different locations, all home developed, is already a better test than some I’ve seen or read online!

RSS 617 (pinhole camera)

I chose to buy premixed chemicals for convenience so headed to the Nik & Trick website (I’m based in the UK). The developer comes in two parts (A and B) which you mix with water as you need it. The usual dilution is one part of A, one part of B and 100 parts of water (1+1+100) although this can be varied. Based on his own experience Andrew suggested sticking to (1+1+100) and I saw no reason to ignore this advise. He also recommended Sandy King’s website, advise I would echo too having perused its contents (although when I checked the website to pop a link in here the server was unobtainable).

The chemicals are very easy to use, if you already home develop then you will have no issues. They need to be made up as you need them and thus far I’ve not had the stock bottles open long enough to comment on their shelf life. The only two things that need to be kept in mind are that acid can dilute the stain so use plain water for a stop bath and an alkaline fixer. I’ve bought some fixer specifically for this project but once my normal fixer is used up I will move to an alkaline fixer for all my black and white developing simply to keep things simple.

Rollei Magic

Thus far I’ve been very happy with the negatives I’ve got from this combination. There is plenty of detail and they scan very easily. I have yet to print from them in the darkroom but looking at the negatives in front of me I cannot imagine that there will be any issues. As I’ve said though this is only an initial update after six rolls of film. Over the Summer I will get a chance to test it further and may even extend the trial to include the half dozen rolls of Fomapan 200 I’ve got in the cellar. So far I’ve only used 120 film in this project but I will be adding some 35mm film to the mix very soon, the KMZ FT2 is locked and loaded with Fomapan 100 and I’ve even dug out the Olympus XA2 and treated that to new batteries and a roll of Fomapan 100!

I shall report back later in the Summer!

A Lomo-Day

I met up with good friend Jon in Leeds recently for a photo-walk and darn good natter. As has become traditional on these occasions, Jon brought a camera from his collection for me to play with.

Lomo LC-A 120 | Fomapan 100 | Pyrocat-HD

This time it was a Lomo LC-A 120 medium format camera and I’d come armed with a couple of rolls of Fomapan 100. As an aside I’m trying a new-to-me film/developer combination at the moment (Fomapan 100 and Pyrocat-HD) and it was this project rather than the light which drove my choice.

Lomo LC-A 120

We met as always on the train, which I catch in Halifax and Jon in Bramley and upon arriving in Leeds made the, also-traditional, visit to a coffee shop. We like to start with a brew, a quick catch-up, a chance to load up the film cameras (always plural) and decide on a plan of action. I had my KMZ FT2 with a half roll of Adox CHS 100 II as well as my Rollei Magic (in 645 configuration) with a half roll of Fomapan 200 loaded. I planned to finish both rolls during the walk. So, with the Fomapan 100 in the LC-A 120 that Jon lent me I was ready. Jon was in colour-mode with a lovely Olympus XA4 (Lomo Metropolis if I recall) and a new-to-him Leica rangefinder (Kodak Colour 200) getting a maiden outing.

KMZ FT2 | Adox CHS 100 II | Adox FX39 II

Our walks usually start and finish in the centre of Leeds but this time we opted for a linear walk. Along the Leeds and Liverpool Canal to Kirkstall Brewery Bridge at which point we would leave the canal and walk on to Bramley railway station where I could catch a train back to Halifax. It was going to be a longer walk than either of us had done for a while! Indeed, checking my pedometer before bed that evening I found that I’d covered around ten miles in total throughout the day.

Lomo LC-A 120

Since first chatting in an online forum a few years back Jon and I have become good friends in real life too, initially through the shared interest of film photography. However, these days our conversation ranges widely, covering the domestic and current affairs as well as film photography. That to me is a sign of true friendship as is the fact that whenever we meet it’s like resuming a conversation you’d only finished ten minutes before … even though it’s been a few months since we last met in person.

As with many urban waterways the Leeds and Liverpool canal offers up many interesting scenes to the photographer, not the least of which is the inevitable graffiti. It would’ve been rude not to make some images, even if I was using black & white rather than colour.

Lomo LC-A 120

At Kirkstall we left the canal and forced ourselves to have a couple of pints in a local pub before the near-two miles walk (including around five hundred feet of ascent) that was needed to get me across town to the railway station. I saved £1 by catching the train from Bramley rather than Leeds although I’m not convinced that the uphill slog was worth the single pound sterling!

Rollei Magic | Fomapan 200 | Rodinal (1+50)

My impressions of the Lomo LC-A 120? Well, it’s definitely a fun camera to use. Basically it’s a medium format point and shoot camera that is lightweight and easy to carry. It doesn’t feel very robust, being largely plastic and as I’ve said very light. It’s definitely not a camera I’d throw loose in my shoulder bag.

Loading the film wasn’t the smoothest and it’s fair to say that the wind-on and spacing of negatives isn’t the most consistent. I lost the first frame on both rolls and varying parts of the second too.

Left: Lomo LC-A 120. Right: Rollei Magic
The part-frame from roll two – Lomo LC-A 120

I’m not one to cry over lost frames, it’s part of the experience of film photography, but the first frame and a half that I lost from the first roll were disappointing as it was a scene I very much liked (see above). Luckily I liked the scene enough to photograph it with the Rollei Magic too.

Lomo LC-A 120

One thing that very pleasantly surprised me about the LC-A 120 was how well the meter coped with everything I asked it to deal with. All of the frames are well exposed even when I probably was expecting a bit too much from the camera. From an exposure point of view I could have shared any of the images and not been embarrassed. A small aside here, the Fomapan 100/Pyrocat-HD experiment is going well!

All that said, I did enjoy using it even if at the end of the day I won’t be putting my hand in my pocket for the £450+ needed to buy my own.

A couple of tricky scenes but the meter handled it very well I thought – Lomo LC-A 120

So, another good day out with the camera. Good conversation, an enjoyable walk and a couple of lunchtime pints – what’s not to like? I hope you enjoy the images I created along the way.

The Challenge of 617

My interest in the panoramic format is well documented throughout my blog especially with regard to the Reality So Subtle 617 pinhole camera and more recently the Chroma 617 in its standalone and Graflok-back guises. To me the format comes reasonably naturally and it’s fair to say it’s become my go-to format when I get the opportunity for some dedicated photography time. However, I know from chatting to others that the format can be challenging, not least in terms of composition.

But why is this I wonder? To be honest I’m not sure I have the answer. I have been making photographs since the 1970s, some times more active than others, and over the course of fifty-odd years I’ve read more guidance and advice on the subject of composition than I care to think about. Indeed, I no longer think about it if I’m honest. The Golden Ratio, the Rule of Thirds, the Rule of Odds, Leading Lines … the list goes on.

When I first started taking photography seriously I followed these rules very assiduously, especially the Rule of Thirds, and with the benefit of hindsight missed plenty of opportunities by following the “rules” so slavishly. On the plus side I do think that by using these concepts as a guide I accelerated my learning and development as a thoughtful photographer.

Mid-way twixt centre and the third perhaps?

Never Put the Subject in the Centre. Well, putting your subject centrally does contradict the Rule of Thirds I guess. But I’ve made plenty of images by putting the subject in the centre thus creating a very pleasing image to my eye. Including panoramic images. In particular, the square format really lends itself to central positioning of the subject to my mind.

My main criticism of this is the patch of sky top left … not the central placement of the yacht.

That said, when I look at my more recent images, all made intuitively without and conscious thought about “rules”, it’s amazing how often I compose things in what might be, indeed has been, described as “formal”.

Another central point of interest although the overall composition does provide a traditional foreground (albeit reasonably central), mid-ground and background

Perhaps it’s partly that when we start out in photography we are influenced by the inbuilt format of the film stock or digital sensor. Three by two is a typical format as is four by three. If we start by using one of these exclusively our eye becomes accustomed to seeing in that format I suspect, making the transition to another image format problematical. Kind of like returning to the start perhaps?

Then, of course, there is the sheer amount of real estate that a 6cm x 17cm negative provides. With so much space to fill it becomes trickier to eliminate extraneous elements that disrupt the image.

That said, I firmly believe that the 6×17 format can be mastered by all. It’s a matter of practice and experience I think. Over the Summer I hope to get out more with the 617 kit so I will share more images on my blog which hopefully will serve to inspire and encourage others to embrace this challenging but incomparably rewarding format.

You did what?

I woke early on Saturday so whilst the household slept I picked up the nearest camera, the Leica iiif as it happened, checked it had a film in, then wrapped up warm and headed out for a morning stoat before breakfast.

Toned to add to the “old” aesthetic

It wasn’t until I took the camera out of my pocket to make the first exposure of the day that I realised it was loaded with a roll of Kodak P3200. I’d loaded it a few days earlier for an evening walk which never happened; it’s certainly not a film stock I habitually use, nor one I’d have chosen for a morning walk. Rather than return home however, I opted to rate it at 1600 ISO, set the lens to f11 and simply vary the shutter speed as required.

Later in the day when I mentioned to a good friend that I’d taken a roll of P3200 out on a bright sunny morning he replied – “you did what?” hence the title of this post.

I’ve don’t recall having used P3200 in proper daylight before so I was intrigued as to what I’d end up with. It’s nominally an 800 ISO film but is designed to be pushed (hence the P) to 3200. I’ve used it a couple of times in very low light but never in full-on daylight. First job when I returned home was to attend to some domestic matters but my next task was to decide how and with what to develop the film.

Of the developers recommended on Kodak’s data sheet the only one I had in stock was HC-110, or to be precise, Euro HC which is the clone from Bellini. Dilution B for 9.25 minutes at 20° was their recommendation and I saw no need to stray from this suggestion so I went ahead and developed the roll.

As you will have noticed the results are somewhat on the “crunchy” side, very noticeable grain which some will not like. Indeed, anyone brought up on a digital-only photographic menu will consider them “noisy”. But this isn’t a digital artefact, it’s an organic element of the actual film itself.

Rather than try to use the magic of Lightroom to tame the grain I opted to not only leave it but to a small degree emphasise it for creative effect. These are all digicam-scans of the 35mm negatives that have been inverted and gently tweaked in Lightroom. I’ve not yet had a chance to get them into the darkroom but these negatives are my next darkroom subjects.

So, all in all I’m reasonably happy with how these turned out. It could’ve been a proverbial road crash but the images, as scanned, have plenty of character and a certain look that is not unpleasant. They’ve definitely got an aesthetic that I am enjoying. Sometimes the polar opposite to digitally clinical images can be very appealing.

Will this become a regular combination? Well, no. That said I do have a roll of P3200 loaded in my KMZ FT2 at present although my intention is to expose that at ISO 800.

The moral of the story however is don’t be afraid to try something different. You might be pleasantly surprised!

All images: Leica iiif | Kodak P3200 | Euro HC (1+31)

A Pinhole Interlude

First stop the churchyard.
All images: ONDU 6×6 Rise | Rollei Retro 80S | Rodinal (1+50)

Half-term for us spanned three weeks with the grandchildren at different schools in different parts of the county. Photographic excursions were therefore limited but on one day, finding myself with just one grandson in tow, I ventured out for a walk through town and along the local canal. My chosen camera was a favourite – the ONDU 6×6 Rise pinhole camera, loaded with a gifted roll of Rollei Retro 80S (thank you Andy), together with a mini tripod.

I might have pushed the sliders a bit far on this!
Grandson “holding still” for thirty seconds

I lent the grandson a digicam to keep him amused whilst I exposed my roll of film. We made images in the churchyard, the street, views from the bridge over the river, the towpath and views over the valley from part way up Gog Hill.

If I’m honest, this was not my best ever outing with the pinhole. Keeping an eye on an eight year old, especially by a main road and then a canal, and keeping on the move to keep him from getting bored were with hindsight not the most conducive conditions for pinhole photography. In particular the ones taken from the bridge, where I had to steady the mini-tripod, do seem to be suffering from a little camera shake!i

Next time I will simply take a 35mm rangefinder!

Nice detail in the trunk – no camera shake here,

One of the things I enjoy about pinhole film photography is what I think of as the organic look it produces. This is never more evident than when photographing trees and the canal side is a great spot for this.

From the canal we made our way up Gog Hill. This cobbled hill is a real lung-buster for us Oldies but thankfully there’s a few nice views out over the valley to afford respite if needed.

So, in conclusion, not my best day in the field but nevertheless the images still have “something”. What it is though I shall leave to my reader!

510 pyro – one roll is not a proper test

All images: Canon VL2 | Jupiter 12 (unless stated) | Fomapan 100 | 510 Pyro

It was inevitable that I’d eventually give the 510 Pyro developer a try and back in May 2023 I donned the nitrile gloves and made up a batch.

Before … and After

I clearly got distracted during this test, as not only did I only develop two rolls (one 35mm and one 120) I also left the draft blog post barely started and only picked it up again ten months later. Looking back through my notes for last year these were the only two rolls that I developed in 510 Pyro throughout the whole year.

Negative and simple inversion in Snapseed

Now, despite what some “influencers” on social media would like you to believe, it takes more than a couple of rolls and one film stock to truly judge a developer. So far, what I’ve seen hasn’t deterred me and I will hopefully make some further tests later this year. Until then I’m simply making a line in the sand as it were and registering my intent to finally finish this experiment.

This staining developer is both much hyped and also it seems a divisive one. Some people I know swear by it whilst others of my acquaintances can’t really see what the fuss is about.

For the reasons already expressed I’m sat on the fence I’m afraid.

For now.

One from the archive

Having completed my mammoth Scottish blog series recently I have been deleting the temporary files stored on my tablet and in doing so I have also been rediscovering some images from the last year or so which are still floating around in temporary folders.

This one jumped out at me as soon as I opened the folder. It’s one of those happy accidents that we pray for with expired film. The film stock was Perutz Primera 200 a C41 process film that I exposed at ISO 100. The camera was the Leica IIIf with the lovely Elmar 50 lens. I home-developed the film with the Bellini C41 kit which has become my go-to for home processed colour film.

I hope you enjoy this as much as I do.

Friday – (more) travel

Fuji X100T

The final day of any trip involves the wearisome task of driving home. Generally it would be me sat behind the wheel but one of the luxuries of mine and Dave’s joint travels is that Dave usually drives. We are conscious of wanting to squeeze a few more photos out of the week but equally conscious that we also need to get back so on the return leg we adopt the approach of driving unless or until we see something worthy of a roadside photo. We don’t go “off-piste” and explore side tracks, nor do we generally head towards one final destination. We always end up making at least one stop!

First though, breakfast at the Green Welly in Tyndrum.

I was pleased to be sat in the passenger seat – iPhone 13 Pro

As it was there were no temptations on the drive back home this time. The weather finally turned against us and we were only too happy to plod on down wet and murky roads stopping just once for a coffee until we reached the comfort of my front room and a mug of proper Yorkshire tea.

The photographic fates had one last sting in the tail for me however. I had taken the Fuji X100T with me for a quick stroll before departing the cottage and made a few images so that I would have something for my ongoing 366 challenge should we not make a photo stop driving back. I was mightily glad that I had in the circumstances as the three pictures I took were the only ones of the day. However, I had not noticed at the time that I’d left the camera on ISO 200 so everything was shot at 1/4 of a second … not my sharpest ever images!

One last look at Loch Leven – Fuji X100T
“Home” for the week – Fuji X100T

Whilst the final day might have been a bit of a damp squib photographically it couldn’t take the shine off a thoroughly enjoyable and creatively productive week. There’s no getting away from the issues I had with the 6×17 film holder but the lessons learnt along the way will contribute to many far more successful outings I’m sure. The various drone flights produced some very satisfying images and I had the pleasure of watching Dave grow more confident with flying his drone as the week progressed. The Fuji X-T3 performed flawlessly throughout the week and the new magnetic filter system that I bought for the trip proved to be a joy to use (I might, just might, write about it one day).

The Corpach Shipwreck – iPhone 13 Pro

I will probably produce one final blog post from this trip comprising of images that didn’t make the daily diary posts, however given the snail-like pace of my digital post-processing I’d not hold your breath on that! In the meantime here’s a few from the trip that haven’t yet made it into my blog.

Loch Linnhe. Fuji X-H1
Bridge of Orchy. Horizon S3 Pro, Kentmere 400
Millochray Bay. Intrepid 4×5/Chroma 617, Adox CHS100
Near Caolasnacon. Fuji X-T3
North Ballachulish. Fuji X100T
Corpach. DJI Mini 3 Pro
Clachaig Falls, Glencoe. DJI Mini 3 Pro
56°33’42.318″ N 5°4’27.918″ W. DJI Mini 3 Pro
Ardour. Fuji X-T3

Wednesday -the Corran ferry

My pre-breakfast walk was very productive today. Both: Fuji X100T

Wednesday’s agenda was one that Dave and I had chatted about prior to the trip. Ardour via the Corran Ferry.

Ardgour is one of five peninsular that make up the West Highland Peninsulas. It was described to us as a beautiful, remote and unspoilt place. It’s also an area we’ve never been to so  with the offer of a ferry crossing to avoid a long drive up and around to get onto the peninsula, and some stunning scenery we couldn’t resist.


The Peninsula have a very ancient history, stretching from the Mesolithic people of over 6,000 years ago, through iron age settlers, to the Irish Saints who were followed by the Vikings. Then came the Highland Clans, followed by the Clearances and ultimately the formation of crofting communities which make up the many thriving townships and hamlets that exist today. Source: https://www.westhighlandpeninsulas.com/about-the-peninsulas


The ferry takes around five minutes so inevitably we spent longer waiting for it to come across and then load up than the actual crossing did. However, it saved a very long drive and meant we could get on with our photography without delay

The ferry returning to Corran

We’d not been on the peninsula more than a few minutes when we “had” to stop. It was the first of many, many such stops throughout the day which was a fabulous mix of creativity and relaxation. The Yorkshire tea bags had run out the previous day so we were reduced to drinking some unbranded stuff but sat amongst this stunning scenery it tasted like nectar.

One of many stops! Fuji X-T3
all iPhone 13 Pro

Within the first hour on the Ardgour Peninsula we had stopped so many times we realised that we wouldn’t get around before nightfall at the current rate of progress. We agreed that we needed to up the pace or at least stop less frequently. Within five minutes we’d stopped again.

IPhone 13 Pro

But what a stop. It provided one of my favourite images from the trip, tea and sandwiches as well as a chance to play with the film cameras.

Intrepid 4×5, Chroma 617 film back, Nikkor 150mm, Ilford FP4+ f45 1/8th sec
Intrepid 4×5, Nikkor 150mm, Fomapan 100 f45 1/2 sec

This is where I shall leave things for Wednesday. There were still plenty of images to be made and we kept pottering until we lost the light. For me the half hour or so we spent at lunch, me with the big 4×5 camera on the tripod making just four exposures, Dave with his feet up enjoying the rest, was one of the highlights of the trip.

Scotland – film woes

One long light leak across the top of the image and a nasty “bloom” midships

Firstly, a big thank you to those of you on social media who empathised with me over my 6×17 film back woes following my last post. As you all suspected it was a light leak but at the time of shooting these six rolls I was blissfully unaware of any issues. I’d tested the film back before leaving home and all had been well so there were no reasons to expect any issues.

As I was developing the film in my kitchen at home in Elland I started to notice that most, but not all, of the rolls were showing light leaks. Not a uniform pattern however but random and unpredictable. That I was looking at light leaks I had no doubt but as to the cause, whilst it was obvious when I worked it out, that took me a few hours to fathom. I was able to rule out the Intrepid itself as the sheets of 4×5 had all come out exactly as expected so the Graflok adaptor or 617 roll film back were the logical culprits.

The feathery light leaks along the bottom of the frame were readily spotted by readers

As these first two images demonstrate, in some instances (above) the leaks were little tendrils poking up or down into the frame whereas in others (top) there were long streaks the length of the negative and even blooms of light causing low contrast across the middle of the negative. This lack of consistency initially caused me to miss the true cause of the problem.

Sat with the negatives on a light-pad I was struggling to make sense of the phenomenon. With nothing leaping out at me beyond the fact that these were light leaks I sat and thought back to my experiences in the field.

It was a new piece of kit and therefore my experiences with it were limited (I’d tested it successfully before setting off for Scotland) but nevertheless I was able to readily recall some of the niggles and challenges. It might help to explain how the system works. The system is in three parts: a focusing screen, a film holder and a Graflok adapter that fits into the back of the 4×5 camera and receives in turn the focusing screen and then the film holder.

Intrepid 4×5, Chroma Graflok with 617 film back attached

As I pondered it dawned on me that without fail I’d not been happy that the Graflok adapter was sitting properly between the Graflok clips. At times it felt very insecure and on one occasion it had almost fallen off. I therefore got the camera and Graflok back out and looked carefully at them.

Eureka! It was so obvious that I was a little embarrassed and almost chose not to share my experiences publicly.

I am right handed and therefore unless the sun is shining directly onto the right hand side of the Intrepid I always load film holders from the right. My Intrepid’s back is therefore permanently in that configuration and as the roll film back has a distinct top and bottom I was fitting it accordingly. Now, the back of film holders have a groove and a raised bar across their whole width that fit into corresponding fixtures on the Intrepid’s back and so does the 617 film holder. However, I suddenly realised that the Chroma 617 film back is designed to be used with the field camera set up in left-hand orientation. Or to put it in a way I understand, the film back is designed to fit with the field camera set up as if for left hand loading.

By using it in the opposite orientation I was introducing leaks but not in a predictable way. Depending on just how the Graflok adapter was sat the light leaks could be lengthwise, central “blooms” or tongues of light licking into the negative.

Not the Northern Lights!
You get the idea!!

But why had my test roll been non-problematic? I looked at the negatives again, visualised the location and checked my notes to see the time of day I had made the test. Of course! It was a bright, sunny day with a cloudless sky … and the sun coming in from the right. I’d instinctively put the field camera into left-handed operation out of sheer habit. As a result the back fitted snugly and as designed.

When it went well as with this roll I was well pleased with the results – all film scans Ilford FP4+

In my defence the film back comes with no manual nor even a one-page instruction leaflet. Had it done so I might not have spoilt six rolls of film but caveat emptor and I’m just glad I worked it out before binning the whole set up!

A quick test roll back home with the camera now set up “left-handed” went smoothly; Graflok adapter fitted properly and sat firmly and four clean, leak-free negatives were soon hanging to dry.

So, ignoring all the problems I encountered whilst away, what do I think of the set-up? Well, it’s definitely a bit of a faff but at the end of the day not that much more than “normal” large format film photography. Most of the issues I encountered were because I was using it the wrong way round. With some of the traditional backs I’ve seen the ground glass is hinged and is dropped out of the way to insert the film holder. Here it has to be physically removed each time. The focus screen simply hangs in place so remember to remove it before moving the camera! All told, the system doesn’t feel as robust as a traditional metal back would but then it’s less than a quarter of the cost and far more readily available!

Milarrochy Bay – long exposure

So, there you have it. A salutary tale but should any of you be looking at purchasing one of these backs then you will be forewarned and will avoid the disappointments I encountered. The roll film back will have a place in my bag whenever I take the 4×5 out to play; it’s light and doesn’t take up too much space. I remain committed to the panoramic format however and to the 6×17 format in particular.


UPDATE: further to Kevin’s comment (below) I checked the Chroma website and they do now offer a left- or right- option … make sure you choose the one that best suits your needs! 3/5/2024