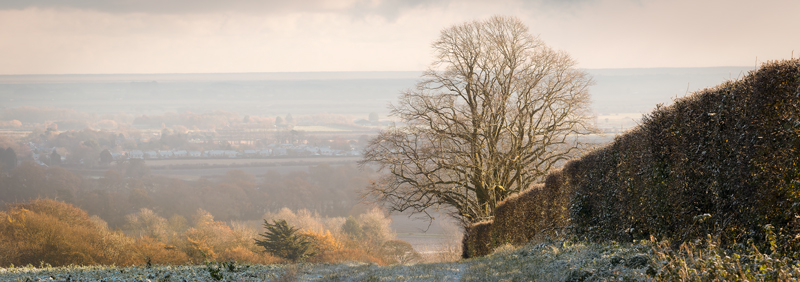
My interest in the panoramic format is well documented throughout my blog especially with regard to the Reality So Subtle 617 pinhole camera and more recently the Chroma 617 in its standalone and Graflok-back guises. To me the format comes reasonably naturally and it’s fair to say it’s become my go-to format when I get the opportunity for some dedicated photography time. However, I know from chatting to others that the format can be challenging, not least in terms of composition.
But why is this I wonder? To be honest I’m not sure I have the answer. I have been making photographs since the 1970s, some times more active than others, and over the course of fifty-odd years I’ve read more guidance and advice on the subject of composition than I care to think about. Indeed, I no longer think about it if I’m honest. The Golden Ratio, the Rule of Thirds, the Rule of Odds, Leading Lines … the list goes on.
When I first started taking photography seriously I followed these rules very assiduously, especially the Rule of Thirds, and with the benefit of hindsight missed plenty of opportunities by following the “rules” so slavishly. On the plus side I do think that by using these concepts as a guide I accelerated my learning and development as a thoughtful photographer.
Mid-way twixt centre and the third perhaps?
Never Put the Subject in the Centre. Well, putting your subject centrally does contradict the Rule of Thirds I guess. But I’ve made plenty of images by putting the subject in the centre thus creating a very pleasing image to my eye. Including panoramic images. In particular, the square format really lends itself to central positioning of the subject to my mind.
My main criticism of this is the patch of sky top left … not the central placement of the yacht.
That said, when I look at my more recent images, all made intuitively without and conscious thought about “rules”, it’s amazing how often I compose things in what might be, indeed has been, described as “formal”.
Another central point of interest although the overall composition does provide a traditional foreground (albeit reasonably central), mid-ground and background
Perhaps it’s partly that when we start out in photography we are influenced by the inbuilt format of the film stock or digital sensor. Three by two is a typical format as is four by three. If we start by using one of these exclusively our eye becomes accustomed to seeing in that format I suspect, making the transition to another image format problematical. Kind of like returning to the start perhaps?
Then, of course, there is the sheer amount of real estate that a 6cm x 17cm negative provides. With so much space to fill it becomes trickier to eliminate extraneous elements that disrupt the image.
That said, I firmly believe that the 6×17 format can be mastered by all. It’s a matter of practice and experience I think. Over the Summer I hope to get out more with the 617 kit so I will share more images on my blog which hopefully will serve to inspire and encourage others to embrace this challenging but incomparably rewarding format.
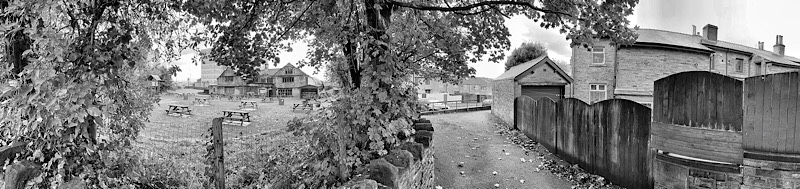
Yesterday whilst running errands I took a quick drive through Halifax and up to Mount Tabor to check out a couple of locations for some panoramic film photography. Despite being retired I still only get limited opportunities for “serious” photography so it’s good to have a few ideas tucked away ready to follow up when the right conditions coincide with some free time.
I didn’t make any photographs apart from the one above which I made with the ever-present Fuji X100T and used for my 366 project/challenge.
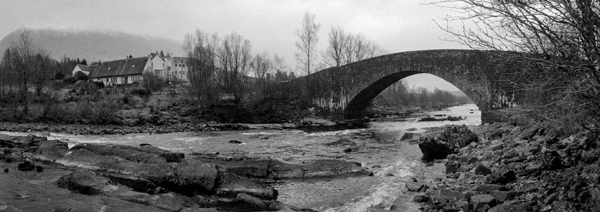
As mentioned in my previous post, I recently spent a day and a half driving around the Lincolnshire countryside with a very good friend and a bagful of photographic kit. One of the cameras was a borrowed Chroma Cameras SIX:17 which I had paired with my Schneider 90mm f8 Super Angulon lens. The lens was first produced in the 1950s and apart from the addition of multi-coating the design remained unchanged until it was discontinued in the early 2000s. Its 100° field of view is well suited both to the panoramic format and to how I see the world.
I was just too late to catch the rainbow in the centre of the frame
I took half a dozen rolls of film with me but despite the lovely light I used just two rolls of film in the end. One was Kodak Portra 400, a lovely colour negative film but at around £17 a roll it’s an occasional treat which might explain my very low throughput with that loaded. The other was a very out of date roll of Ilford FP4+, one of my favourite black and white films.
Late afternoon light … the best light was to follow on the next morning
A quick word about the Schneider 90mm f/8 lens is perhaps apposite at this point. I use this lens with a 5×4 large format camera and it’s 210mm image circle covers the 6×17 format nicely too. For those used to digital cameras this would seem like a very small maximum aperture, but in this format it still renders a relatively shallow depth of field – although I’m not going to get into that mares nest here! Compared to my f5.6 large format lenses it is not as easy to focus with but the use of a loupe and a dark cloth (or coat) makes for a relatively straightforward experience.
The first image of the day – what a great start!
As would be expected my first priority on getting home was to develop the two rolls of film. Indeed, as I type this a week later almost all of the digital files are sat on a hard drive un-processed and unseen for now. Developing films are part of the overall process of film photography and a part I enjoy. I still experience a thrill pulling a roll of well-exposed negatives off the reel almost fifty years after my first one. Now, the Portra yielded lovely results as can be seen although I had a mare with digitising the negatives but perseverance paid off and I was well pleased with the results in the end. The FP4+ negatives were similarly well exposed but the expired film showed some signs of deterioration which is most apparent in large expanses of single colours … or the sky as I call it.
The first image of the trip
So, having done the fun bit I am now faced with the task of working through the digital files from three cameras. Don’t get me wrong I enjoy using all of my cameras and the convenience of digital is not lost on me. However, it wasn’t until lunchtime on Day 2 when Dave was checking the images on the back of his Nikon D810 that I realised I’d not looked at the LCD screen at all in over six hours of photography.
My favourite of the trip
I will close here with my favourite image from these two rolls … what’s the odds on it being my favourite of the trip?
Next time: the DJI Mini 3 Pro drone, or my guilty digital pleasure
What do you do when inspiration fails you? Losing your mojo it was once called, perhaps still is but I’m old and out of touch these days.
In days gone by when I lost my mojo it would invariably end up with a new piece of gear arriving at the door and the subsequent “need” to test it was the impetus needed to get of my backside and do something. That was then though, but now is now and lots of things have changed and I don’t just mean getting older! A good salary, car paid for by the company and two incomes coming in made such indulgences possible. Indulgence it was too truth be told, as the thing that actually brushed off the loss of enthusiasm wasn’t the new gear. It was the simple act of just getting off my backside.
Which is probably just as well as we now have none of the benefits that allowed previous expenditure possible. So, in a year where I’ve indulged the GAS* more than I should have, a loss of enthusiasm has to be tackled differently. And this is where the years of indulgence actually prove their worth.
Whilst I’ve sold a lot of the “must have” kit over the years (clearly, it wasn’t as necessary as I thought) I have invested the proceeds from the sale of two well-spec’d full-frame DSLR systems in other gear much of which hasn’t had as much use at it should have … until now.
So these days when a lack of motivation strikes I can wander to the boxes at the bottom of the wardrobe and pull out a camera or must-have gadget I’ve not used in a while and enjoy having something “new” that needed to be tested.
Now, I generally get out most days of the week with a camera but on the 9th of November I realised that I’d not exposed a roll of film since my stoat with Jon twelve days earlier. I’d kept my 365 going, primarily by using my smartphone and old-faithful Fuji X100T though, but after 2,200 consecutive daily captures that is done on autopilot mostly these days. So off to the wardrobe it was!
There’s little jeopardy as to what I selected as I posted about it on the day. The RealitySoSubtle 617 is one of my favourite cameras so I was more than surprised to note that I have only used it once this year, back in March! On a side note I also realised that I have only exposed seven rolls and eight sheets of film in pinhole cameras in the whole of the year despite having a collection from a tiny 35mm to a brace of 5×4 marvels. Shame on me but I will return to that theme another day as I remedy the shortfall (hopefully) before the end of the year.
So, this is my tip for the day. When you find a piece of kit falling into disuse don’t leave it on the shelf, don’t be tempted to sell it on … pop it in a box at the bottom of your wardrobe and forget about it. Then in several months time when you feel the “need” to buy something new have a rummage in the box.
Oh, and my year to date tally with the RSS617 has now risen to five!
* GAS – Gear Acquisition Syndrome, but you knew that I’m sure!
My regular reader will know that I often wander off on photographic tangents and each time the starting point is generally “what if?” or “yes, but …”. Today’s post is a bit of both.
One of my favourite pinhole cameras is the Reality So Subtle 617,* which, surprise, surprise, is actually a panoramic pinhole camera giving four 6×17 negatives on a roll of 120 film. Loading the film takes some getting used to (I seem to have a few cameras with idiosyncratic loading experiences) but is straightforward once you’ve done it a couple of times. Straightforward, but fiddly for my arthritic fingers (which is why I carry a pair of pliers with the camera) and even more so at the moment with my right thumb in a splint.
The film is fed down and through a shallow channel then back up, along a narrow ledge under two rails (see picture above from the RSS website) then down another channel and up again in to the take-up spool. It’s more straightforward than it sounds and despite my physical constraints I’m reasonably proficient these days if not the quickest! I was dusting the inside of the box recently prior to loading a film and thought “what if I put the film over the two rails?” It didn’t take many seconds for even my small brain to answer “you will have two unexposed stripes towards either end of every negative.” Not good then. “Yes … but…” followed almost immediately. “What would it look like in practice? Would it produce an effect like a triptych?” A built-in triptych mode perhaps?
Well, it would, with a large central portion and two smaller segments either side I reasoned. But there would of course be next to no control over where the scene would be cut. Would something vital to the frame be lost? After all, when I’ve cut these negatives before (both literally and in software) to make a triptych I’ve been able to control where the cut is made and, importantly, none of the scene is lost. In this instance two slices of the scene would be missing. On every negative. Would any of this matter? Would I be better off simply making the usual exposures and cutting later?
In many ways that would of course be the simplest and most logical way of doing things. Scissors or software could then employed and the original scene would be preserved too.
But.
Would serendipity add something to the image? Of course there was only one way to find out.
Two vertical …
… and two horizontal
So, there you have it. Would I do it again?
Probably not. Not because I dislike the results however but simply because it removes some options for me. I can manipulate the full negative to achieve these results whilst still having the full scene. That said, I love how these came out … serendipity was kind to me today!
* incidentally, I started writing a review of the RSS617 last year and still haven’t got it finished. Must try harder!
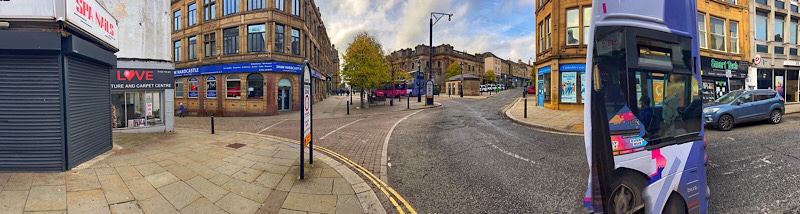
No, I haven’t blown the housekeeping on a new 35mm swing-lens panoramic camera. Perish the thought; in any case I like to eat and have been known to buy the odd beer along with the potatoes and washing powder. No, I was lucky enough to be able to borrow one during a meet-up with good friend Jon in Leeds.
I caught my train without any drama at Halifax, despite it being my first time using my phone as my ticket. My grandson was unimpressed, as he told me “it’s called progress Grandad”. It was also my first time on a train since 2019 but train travel hasn’t changed much in those four-plus years. Jon joined the train part way through so we arrived in Leeds together. Given that it was raining and decidedly grey outside our logical first stop was an excellent little cafe where we enjoyed some first class coffee and loaded up the cameras for the day.
Coffee time!
Coffee & cameras – perfect!
I had taken a couple of rolls of Ilford HP5+ with me to use in Jon’s Widelux and a quick meter reading as we left the cafe indicated that I’d need to rate it at ISO 800. The Widelux has very few shutter speeds so I set 1/125th second and an aperture of f8 and basically used the camera in that configuration as if it were a point and shoot model. In this mode I rely on experience to alert me to the need to recheck the light levels and/or tweak the settings. As the conditions didn’t improve though I stuck to these settings for all but a handful of exposures when the presence of deep shadows caused me to use the 1/15th of a second shutter speed. Yes, like magic this camera can be handheld successfully at 1/15th second – which, given that it’s a swing lens camera actually takes a couple of seconds to complete!
My first couple of Widelux images
My first couple of images were vertoramas and show the conditions quite nicely. Whilst the mist quickly disappeared the greyness persisted and the dull, featureless sky remains stubbornly off-white. Incidentally, I made two exposures as I was concerned I might have accidentally got my fingers in the first (I hadn’t and in fact by some miracle I managed to avoid this common error for the entire walk).
I have had a fair bit of experience with swing-lens panoramic photography over the last couple of years and found that this transferred seamlessly to the new piece of kit. The main issue I had was the light which was not exactly conducive to creativity but again experience helped and I was quickly “in the zone” to use the vernacular.
Frame three – I wasn’t going to let the conditions defeat me
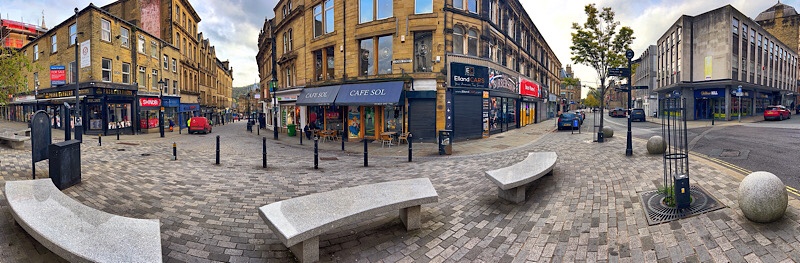
It had been a while since Jon and I had met last so any disappointment with the light was quickly forgotten as we chatted and caught up on the various goings-on in our lives. I generally like to be on my own for my stoating about with a camera but occasionally it’s nice to share the walk with another and this day was no exception. We started by walking out of the city centre before retracing our steps to head back in towards Leeds Docks and our second coffee stop. It ended up as a brunch stop truth be told! It was also the ideal time to load up the second roll of Ilford HP5+.
I have mentioned the benefits of experience before in this post particularly with regard to the technical aspects. However, it not only helps to determine exposure but can also help with creative decisions such as composition and where to stand to capture a point of view which produces an eye-catching image. Knowing how the camera “sees” a scene is very useful and nowhere is this more useful than with these panoramic cameras where viewfinders tend to be very basic. Thus in the image above I was fairly confident that the edge of the canal and the expanse of bridge would wrap themselves around the scene very nicely. It’s always good when a hunch comes off and here I need to acknowledge John Farnham whose Widelux images I’ve studied over the last few months and through whom I started to get a feel for what the camera can do before I’d even seen one in the flesh.
The conditions suited a toned image I thought
So, what do I think about the Widelux and would I part-exchange my Horizon S3 Pro to acquire one?
Firstly, handling. All of the 35mm swing-lens panoramic film cameras I’ve used have been finicky in this respect and the Widelux is no exception. A newcomer to the format might initially struggle but after putting three rolls through Jon’s camera I had none spoilt by the encroachment of my digits. The S3 Pro is a little easier to use because it has a pistol grip screwed into the base of the camera which makes it very easy to handle.
Loading film is an interesting experience with both these cameras for sure. Now, whilst Jon kindly loaded all three of my films on the day I paid very close attention and would say that there is little to choose between the two in this regard.
Whilst the S3 has a good range of shutter speeds the Widelux I was using had just three. 1/15th, 1/125th and 1/250th. As already mentioned I went with a point-and-shoot configuration but would have preferred more flexibility. That said, I didn’t miss any opportunities on the day due to the limited shutter speeds.
The Widelux feels very sturdy, it’s certainly not a lightweight piece of kit, but I carried it in my hand or my pocket for several hours without really noticing it. Its boxy shape makes it easier to slip into a large coat pocket than the more curvaceous S3 Pro. Without the pistol grip of the S3 it did take a few seconds more to get the correct grip on the Widelux but that’s a minor niggle in the wider scheme of things.
In conclusion, I thoroughly enjoyed playing with the Widelux. The format is one I’m very familiar with and the Widelux was fun to use. Will I be shelling out the £800+ they currently sell for? In short no. Not because it’s not a great camera but simply because I’ve already got the format covered and at that price it’s a bit rich for my wallet. It was huge fun to use though and I’m definitely going to be asking Jon to bring it along on a future meet-up too! And if I win the lottery …
The current cost of living crisis is clearly affecting many of us in many ways and disposable income is definitely being stretched. As a film photographer I accept the ongoing cost of using film rather than digital but choose to do so as I find film photography more satisfying and rewarding compared to digital. There is a view that film photography these days is cheaper than it was in films heyday; I don’t intend entering into that debate here but the argument normally consists of comparing the price of a roll of film with the average wage or salary. Regardless of the truth or otherwise of that assertion the reality is that the costs associated with my hobby have increased considerably recently whereas my disposable income has decreased fairly substantially too. It would be interesting to compare film cost with disposable income over time but, not for the first time, I digress. The reality is that I’ve always spent more than I should on my hobby but these days it is far more noticeable!
I still use digital of course, and in fact have two digital kits. One is my Fuji X-series set-up which was my go-to photographic kit prior to returning to film. As such it is reasonably comprehensive and as there are some subjects my film photography kit doesn’t cater for adequately the Fuji kit fills the gaps nicely. My other digital kit is a full-frame Canon DSLR with three lenses that I bought for purely sentimental reasons as it was the set-up that I used when I was just starting to make big strides forward in my photography. I partly justified the purchase to my self saying that my Canon EOS film cameras would benefit from the L-series glass too.
All of which preamble is simply to set the scene for a project I’ve started this week partly as a way of reducing my film usage but mainly to explore another photographic avenue. I’m talking of course about my smartphone, a device I’ve experimented with and blogged about before. However, this time I’ve decided to use an under-utilised (at least by me) feature of the phone, namely the sweep panorama.
You didn’t expect me to stick to colour surely?
So, for my 365 this week I’m mainly posting a daily iPhone sweep-panorama but I’ve made more than the required one a day hence the idea for a series and a blog post was born. As the driving force behind this weeks experiments has primarily been a desire to use less film I’ve dubbed it the “cost-of-living panos” project. I probably won’t blog regularly on the series but it’s my intention to keep making daily sweep-panos and so build up a collection of images that might one day make it into a zine.
Be careful of things moving through the frame! A very short bus no less.
Oh, and in case you are wondering, I did still use film this week albeit it much less than normal. Whether that’s 100% down to this project or part of my usual slow down in photographic activity at this time of year remains to be seen. A lot will depend on how satisfying I find producing iPhone panos compared to my trusty KMZ FT-2 I guess. Given that the FT-2 is my most-used camera of 2023 so far it’s going to be an interesting experiment. For the record I have used two rolls of 35mm film this week … both in the FT-2. And, in the interests of full disclosure I’ve also used two sheets of 5×4 film and two sheets of 5×7.
Hopefully you will find these images interesting. Does your phone have this feature and do you use it? If you do I’d love to hear your tips for getting the best out of the technology.
Hanging out of the bathroom window!
I felt I should’ve stepped to my left to get the wall face in the frame …
… so went back the next day
Until next time, stay safe, stay warm and stay creative!
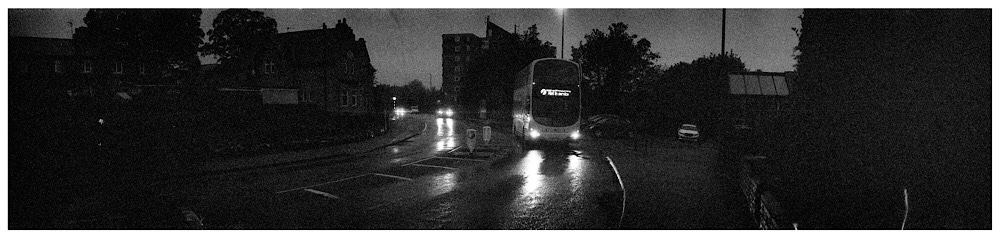
It’s a standing joke amongst my “365” colleagues that I often make my daily image “in me slippers”. It’s also true. Earlier this week I chose to make my daily image before sunrise in the road outside my house. It was raining and yes I was in my slippers.
365-2023-286 #2175
Now, my camera of choice wasn’t ideal (which is why I chose it) and given the limitations of that device I shouldn’t really have been attempting it at all. Which was why I did it. The KMZ FT-2 swing lens panoramic film camera however is no stranger to my blog. I partnered it with an expired roll of Kodak TMax P3200 which given the fixed aperture of the camera, the notional 1/50th sec shutter speed and the lack of light was being exposed at between ISO 6400 and 12800. Not ideal, perhaps not even sane. But I did it.
Out in the dark and rain (in me slippers)
The film jammed after eight frames for an as yet unknown reason and given that it was cold and my slippers resembled two sponges I opted to remove myself back into the dry of my kitchen. One change of socks and slippers later and I was contemplating the part-used roll. Discretion being the better part of valour I decided to cut my losses and develop the roll as it was. I accordingly headed into the darkroom to facilitate the transfer of the film into a developing tank.
Grain like golf balls!
I’d already decided that I’d be using Rodinal to develop the roll so the only decision now was whether to stick with my current favourite dilution of 1+50 or to opt for a semi-standard development at 1+100. Having considered the nominal ISO I’d used I actually changed tactics and went for HC110 (B) and a development time of seventeen minutes. Kodak recommended fifteen and a half minutes for the film exposed at ISO 6400 so given the lack of light I upped that to seventeen.
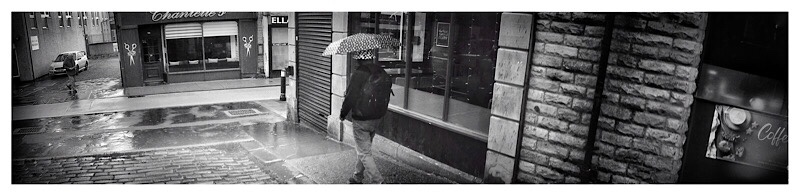
Even white van man struggles to stand out
The results which you are seeing here have captured the atmosphere quite nicely I think and whilst they are technically far from perfect I was pleased with how they turned out. True, there’s grain like golf balls, deep impenetrable shadows and a limited tonal range but they have captured, for me at least, the sense of being there. My feet feel damp just looking at them!


You must be logged in to post a comment.