A “new” lens reviewed: Nikon 300mm AF f4 ED

Yes. Two gear reviews in two days! Although in my usual fashion I’m publishing both on the same day but there we go.

Although I am primarily a landscape photographer these days I do still photograph wildlife occasionally so when a close friend recently bought a new Nikon 200-500mm lens I once again toyed with the idea of adding a long telephoto to my kit.  However, at £1,200 that wasn’t going to happen any time soon so creative thinking was required.

Alongside my full frame DSLR I also have a crop sensor DSLR which got me thinking. A 300mm prime lens for example would  become a full frame equivalent of 450mm on my Nikon D7100. Include a 1.4x converter in the mix and you have an equivalent 630mm lens. If I could find a good quality prime lens of 300mm or perhaps 400mm on the secondhand market at the right price I might be able to go “longer” on a budget. It would need to be good quality glass though especially as it would also be used with a converter at times.  Time for some serious online research.

Fast forward several weeks and the arrival of a Nikon 300mm AF f4 ED lens in excellent condition. Oddly enough it’s a lens I’d been looking at for a while but whenever they came up for sale on that well known auction site the price always soared above my budget. But some things are meant to be and I found the lens via an online dealer at the right price and without the influence of the idiots who think they actually win when buying from an auction site rather than pay I was able to secure the lens at a fair and reasonable price.  Indeed, it cost almost a quarter of the price of the modern equivalent.

© Dave Whenham
Jay (Garrulous glandarius) Nikon D7100, Nikon 300mm AF f4 ED 1/1250th sec handheld at f5.6 ISO 400

So, I was warned to expect slow autofocus, especially compared to modern autofocus lenses, a fiddly automatic to manual focus change and a quirky lens cap. The reviews were right.

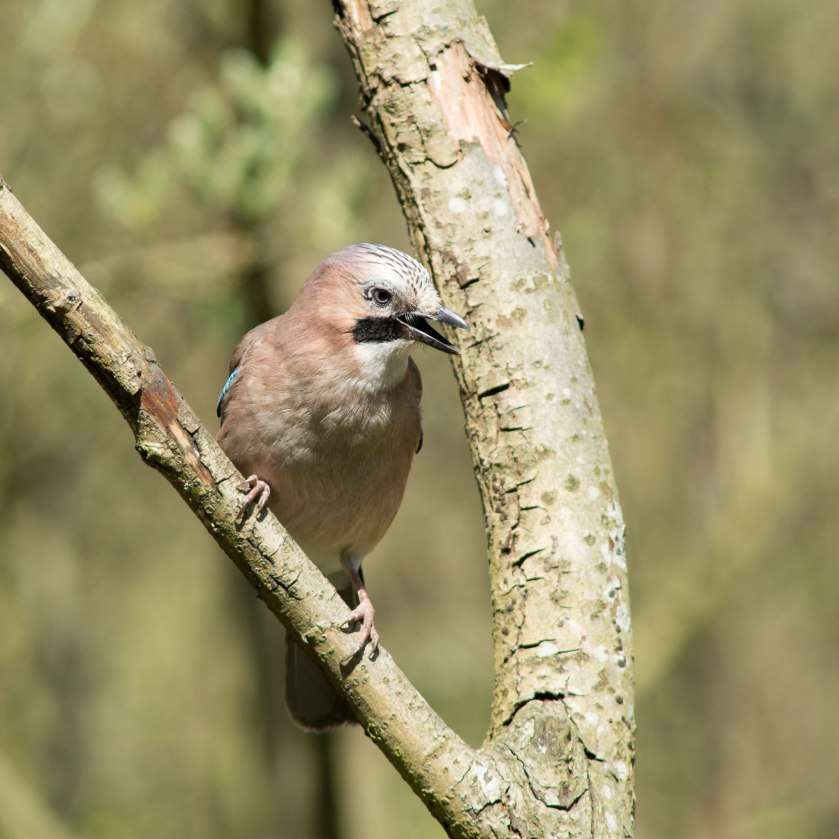
Compared to the newer breed of lenses this one does autofocus slowly. But, within a day of shooting with it (fast-moving little British birds, not my comfort zone at all) I was able to autofocus more quickly simply by taking the time to learn to anticipate how the autofocus would respond and adjust my approach accordingly. Pre-focusing helped tremendously as did back-button focusing especially when allied to a gentle approach with my thumb. As an aside, if you’ve not tried back-focusing then it’s worth checking out. It took me a week to get used to it and I went from hating it to using it exclusively. Indeed I would not buy a camera now that could not be set up for back-button focusing.

Bullfinch-D7100-300mm-DSC_0684
Bullfinch (Pyrrhula pyrrhula). Nikon D7100, Nikon 300mm AF f4 ED 1/1000th sec handheld at f5.6 ISO 400

Once I was in the swing of it I missed very few shots through slow focusing issues although clearly I would have expected a higher hit-rate from a modern lens. Considering that this lens was made between  1987 and 2000 it is at best sixteen years old and possibly almost thirty I was very pleased with how well it worked.

So what about the fiddly automatic to manual focus change?  I have to admit that it is great to be able to just grab the focus ring and take control from the camera, as you can with the modern AF-S lenses. With this lens there is no full-time manual override and moving the lens into manual focus mode needs two separate actions. Firstly moving the AF switch on the lens to “M” and then changing the AF/M switch on the front of the D7100.  The reviews I read suggested this was clunky and awkward; it is. They further implied that it was a big hassle; it isn’t.  I have always taught myself to carry out the most common changes to my camera without the need to move the camera away from my eye. I simply took the same approach with this lens and with a bit of practice it works well.

© Dave Whenham
Bluebells. Nikon D7100, Nikon 300mm AF f4 ED 1/500th sec monopod at f5.6 ISO 400

The quirky lens cap? It’s a fake-leather sock with a drawer string. Very funky and no doubt cherished by many but I’ve just ordered a generic 82mm snap-on cap for day to day use.

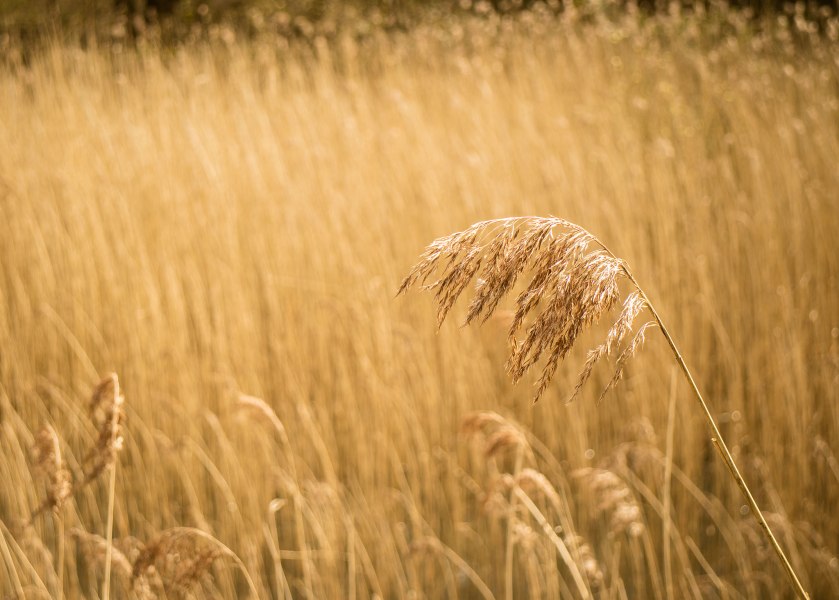
Whilst handling is important the acid test for any piece of kit though is image quality. Practice can make the way a lens handles easier to cope with but nothing can improve poor quality optics. Well, the good news is that I concur totally with everything I’ve read about this lens. It’s image quality is superb. Crisp, sharp images with a very acceptable bokeh, I have been very pleased with the quality I achieved even on my first outing with the lens.  I photographed birds handheld  at Cromwell Bottom, bluebells from a monopod in the woods  and a few handheld landscapes on the Calder and Hebble Navigation for good measure.  The lens was a delight to use and more importantly it was a real delight to look at the files on the computer back at home.

Calder-and-Hebble-D7100-300mm-DSC_0623_04192016
Reflections

One final point, the filter thread is 82mm which is not the most common. That said the only filter I’m likely to use with this lens on a regular basis is a polariser. I use a 105mm filter thread polariser and already have an 82mm – 105mm stepping ring which literally cost pennies as part of a set. This works fine although the built-in lens hood cannot be extended with the stepping ring attached. Sounds like a small point but given that the sun is likely to be to one side of you when using a polariser it may be something to consider in bright sunshine to avoid flare.

So, in conclusion, I paid just under £400 for this lens, a “saving”* of around £1,200 compared to the modern equivalent. Aside from being arguably more difficult to use (I would argue it isn’t, you just need to learn to use it properly) I would put it’s real world performance as being comparable with the best of modern lenses. It’s all-metal construction makes it considerably tougher than modern plastic lenses too which is a real bonus. At a time when far too many of us rush around like busy little bees snapping away at anything that moves and anything that doesn’t it is good to slow down, get to know a piece of kit very well and shoot fabulous images.


  • * Why the quotation marks?  I prefer to say I spent £400 but my wife would say I’d “saved” by buying this lens.

Canon EOS M3 – first impressions

It’s rare for me to bother with reviewing an item of gear; they either fit with my way of working or they don’t.  However, I’ve made an exception for my latest purchase, the Canon EOS-M3 which is a replacement for the original EOS-M that I’ve owned for a while now.

© Dave Whenham
Pinfold Lane

Read any of the reviews and you will hear all about the lack of a viewfinder, slow burst rate or the problems that the original M in particular had with focusing speed etcetera. However, these need to be placed in context with what you are going to use the camera for and why you bought it in the first place. I am principally a landscape and portrait photographer although I do dabble in other genres from time to time including macro and wildlife. Would I use this camera for such specialist activities as macro and wildlife? Absolutely not. I have the appropriate tools for these jobs and why would I not use them? Likewise for portraits, I have specialist lenses and use a full frame DSLR on these occasions. So why did I buy a CSC? Simply because I wanted something pocketable and light to take on my walks which would offer me RAW capture, full manual operation and good image quality.

© Dave Whenham
Moooove that camera outta my face!

The original M gave me all these and given that 95% of the pictures I take whilst walking are landscapes the burst rate, focus speed and lack of a viewfinder were never a major issue.  It was also great fun to use.  So when I saw the specifications of the M3 and the improvements to all aspects of its performance I was immediately interested although I have deliberately delayed my purchase until I was able to pick up a pre-owned copy in near mint condition. I’m a pensioner on a budget after all.

I took the M3 along with two native EOS-M lenses, the 18-55 “kit” lens and 22mm pancake lens, and a Canon EF-S 10-18mm lens with an adapter to fit the lens to the M3.   I also took a small carbon fibre tripod. So that’s a camera, three lenses and a tripod in one small shoulder bag with room to spare and the whole kit weighed considerably less than the Nikon D800E with 24-70 f2.8 lens I sometimes squeeze into the same  shoulder bag.  So in terms of portability and flexibility this set up scores well for me. On a three-hour walk, especially one involving a fair bit of uphill walking, I really appreciated the lack of noticeable weight.

© Dave Whenham
One man’s rubble is a photographers subject

The M3 is also great fun to use. As a lifelong Canon user I find their menus intuitive and familiar. The M3 has several additional dials compared to the original M and these make changing shutter speed or aperture for example much quicker.  The touch screen can also be used to make adjustments to camera settings and all in all the ease of control is excellent. The tilting screen is also great for shooting from waist level or lower and I found it particularly useful as it enabled me to hold the camera over walls to include more interesting foreground interest for example. My grandson and I also had great fun tilting the screen right up and taking selfies but that’s another story!

© Dave Whenham

The tilting screen makes it easy to hang over walls to create interesting foregrounds

One area where I struggled at times was composing without a viewfinder, particularly with high contrast scenes when I myself was in bright sunlight.  This is less of a problem when working off a tripod as you can more easily position yourself to shield the screen from sunlight for example. This was probably exacerbated in my case as my eyesight is poor and I need separate pairs of glasses for distance and close-up work; I need one or the other at all times and can often be seen with both pairs on my head at once.  Not everyone will have the same problems though and the occasional difficulty was not sufficiently annoying for me to consider spending the £200 or thereabouts for the optional EVF.  Sure, Canon should have incorporated a viewfinder but they didn’t and I knew that when I bought the camera so no point complaining now!

The focus peaking is a fabulous improvement that I hadn’t fully appreciated until trying it in the field. With a choice of red, yellow or blue it coped with most circumstances and by adding the menu item to My menu I could change the overlay colour quickly and easily when needed.  For difficult scenes I found that changing the Picture Mode to black & white (not a problem as I shoot RAW so still have the colour file) made it easier to see the colours especially with a lot of grass in the shot.

© Dave Whenham
Calder & Hebble Navigation. Quite a large crop of the full frame

As to that “slow” focusing system all I can say is that it was very fast out in the local countryside. We’ve all seen the YouTube reviewers trying to focus on a swinging yo-yo from two feet but in reality when am I likely to need to perform such a feat on one of my walks?  I sometimes wonder if some online reviewers ever take their cameras out of their house but again that’s another story.

Day two of the review was meant to test the handling when using filters for landscape photography but came to a halt prematurely when the battery level started flashing red after nineteen shots. Now, this, it has to be said, was a schoolboy error on my part. I know from the spec sheet that Canon rate the battery life at around 250 shots and up until last night I’d taken 300 shots on a single charge so really should have charged the battery especially as I know from the M that the meter doesn’t give much warning before it conks out.  I’d already taken an additional nineteen frames and took the pragmatic view that returning to base and heading out again later in the day with a recharged battery was the wisest course.  Note to self, buy a spare battery!

© Dave Whenham
The Master at work

Instead, once I got home and recharged I had a play with the other adapter I have for the M which allows me to use Nikon G lenses. As my main DSLR-based system is Nikon this gives me a further set of opportunities. The  Fotodiox adapter, at £27, is fully manual with a slider to adjust the aperture. The M3’s on-screen histogram was very helpful here in judging exposures when in manual mode on the camera too. There is no EXIF data as the camera doesn’t realise there is a lens attached and apertures are guesses rather than precise but all in all it worked. It would not be practical in situations where speed of operation was called for but off a tripod and with time to play it all works very well.  As ever, horses for courses.

A small niggle and one not uncommon with these types of cameras is that the battery/card compartment is not accessible with a tripod plate in place. That said, and I’ve said as much before, these small limitations are known before you buy the camera and seasoned photographers in particular have no real justification in complaining after the event.

So, with a spare battery now in my pocket I set off for what has become Day Three of this quick review.

Blackley-EOS-M3-IMG_0015_04212016
Lee three-stop neutral density graduated filter

With the M3 on a tripod I was able to use my large Lee filters without any issues. I was using them on a Canon EF-S 10-20 lens as I have no adapter rings small enough to fit the native lenses I have for the M3. Positioning of the graduated filters was a breeze, especially as the screen tilted so I did not have to crouch to peer at the back of the LCD screen. The camera was even able to “see” through a six-stop neutral density filter and still display an image on the screen and  when in manual mode I was still able to use focus peaking. All in all I am confident that for general landscape work the M3 and my Lee filters will work well together.

© Dave Whenham
Grasses – and some nice bokeh

In conclusion, whilst I’m not yet ready to ditch my heavy and cumbersome DSLRs and lenses I have to say that I am really appreciating being able to carry a full kit without compromising on image quality and without needing back surgery. A simple, relatively small shoulder bag holds the M3, three lenses and the lens adapter, a Lee filter holder with filters and spare battery (yes, I have a spare now)  with a lightweight carbon fibre tripod and I am not really conscious of the weight. Oh and I can get my hat and gloves in the bag too!

The Canon EOS-M3 may not be the most popular CSC on the market but it does me proud.