In praise of action cams

As some of you might know I recently acquired a GoPro Session video camera with the vague idea of complementing my blog posts periodically with some behind the scenes video or time-lapse footage as I go about capturing images on my camera.

Well, I now have three of them. Two “Sessions” and a GoPro Hero 3+.  But lets not go there except to say that the third camera was a secondhand bargain from a local thrift shop so comes with virtuous feelings.

I took Zac to the park yesterday and wisely or otherwise allowed him to ride his scooter there. I fully expected to spend most of the time carrying it but in the end he exceeded expectations and the only time I was lumbered with it was when he was on the climbing frames and swings.  Before we left the house however I attached one of the  GoPro Sessions to the front of said scooter and popped the other into my pocket along with a mini tripod.

The footage here is unedited, all I have done is trim the two clips to length. I have left the film as it came out of the camera and have not tweaked the audio at all. It isn’t bad really especially when you consider the relative cost of a Hero Session compared to a DSLR or a dedicated video camera.

In the second clip I am running to catch Zac with the GoPro Session on a small tripod held in my hand at waist level with my arm straight. Remember there are no viewfinders on these little action cameras so it is also necessary to pay close attention to how you are holding the camera and where it is pointing.

But it isn’t the quality that prompted this post. It’s the fact that their size and versatility was what prompted me to pick them up. I wasn’t going to lug a big DSLR with me, far too heavy on a sunny day and indeed even the Fuji seemed a bit much to carry, but a small cube around 1.5 inches on all three sides and around 3 ounces in weight was less cumbersome than my house keys.

I have around thirty minutes footage from the two cameras on my computer at the moment. When we got to the park I took the second Session off the scooter and handheld that too. When I get a chance next week I shall edit and cut it into short sequences and edit them together to create a two minute movie to show the family and share our afternoon out with them. Zac’s parents need to work but doing this gives them a small insight to what their son has been up to in their absence – they feel less excluded. Theres a fifty-one second  clip of Zac on the swings being pushed by myself. His Dad has just sat and watched the raw footage with a big grin on his face. That is priceless and makes the effort, however big or small, of capturing these moments really well worth it.

So let’s here it for the tiny GoPro – truly a hero.  As for Zac – he’s priceless.

Time Passages

Sometimes you have to accept that just because you love an image it doesn’t follow that everyone else will do so too.

I stood at the roadside before the light was up and froze one November morning in 2015 in order to take (make?) this photograph. You could say I invested in its conception.  Perhaps that’s why I like it so much? It was probably the only image from that morning that I kept.

When I saw it emerge from the RAW file on my large computer monitor I was instantly drawn to the way the streaks of the clouds and the shapes in the water suggest movement, the passage of time. Part of my life wandered by whilst stood on the roadside and this image has captured that fleeting moment. Perhaps that’s why I like it so much?

As I looked at it, the words of a favourite song came unbidden into my head. Time Passages. This image links to not just my visual senses then but my aural too.  Perhaps that’s why I like it so much?

I guess the viewer has none of these emotional cues.   I guess that I will just have to accept that just because I love this image it doesn’t follow that everyone else will do so too. Perhaps that’s why I like it so much?

© Dave Whenham

“Well I’m not the kind to live in the past
The years run too short and the days too fast
The things you lean on are the things that don’t last
Well it’s just now and then my line gets cast into these
Time passages”

Time Passages by Al Stewart

Out and About

I went back to one of my regular haunts on the River Calder this afternoon. I’d planned to shoot some video on the canal for the “My Patch” project but harsh light scuppered those plans. Fortunately I knew the little beach alongside the river would be in shade at this time of day.

It was an opportunity to experiment. I used the Nikon D750 to reshoot a couple of sequences for My Patch. I am thinking of re-editing the River Calder section in the light of ongoing learning. I’ve already mentioned that I will probably reshoot all of the voice over files too for the same reason.

© Dave Whenham

My main objective was to try out a few ideas which involved dunking the GoPro Session and then the Nikon AW110 (above) in the river. I should have taken a towel and some water to rinse my hands off after dipping them in the river – noted for next time.

© Dave Whenham

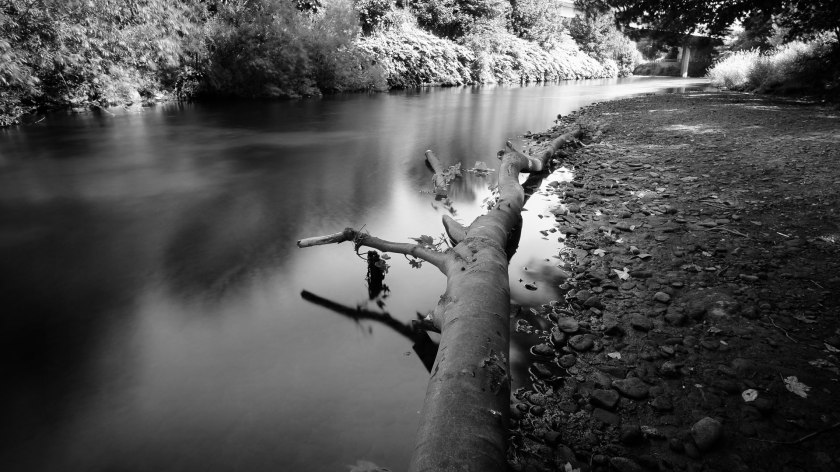
I had also packed my Fuji X-T10 and Samyang 12mm lens so took the opportunity to try out the video function on the camera avoiding the schoolboy error from earlier in the day when I’d shot three video segments with the camera in black & white mode!  I also managed to capture a couple of long-exposure compositions that I’ve had in mind for a while now (see above).

I ended my visit sat on some tree roots recording a “reflective” piece on the Fuji (forgetting I’d put the camera back in black & white mode for the long exposures) and also pacing along the rivers edge speaking into a Lavalier microphone attached to the Zoom H2n which was in my pocket all afternoon.

I also hooked the Rode mic up to the newly-acquired Tascam recorder to capture some ambient audio to play under the video sequence. I’m looking forward to checking the audio quality at some point this week.

All in all I covered a lot of ground this afternoon and hopefully when I’ve had time to reflect properly I will also have learnt a lot!

DSLR video kit overview

Whilst I try to reference the kit I have used where relevant I don’t think I’ve ever devoted a blog post simply to describing the kit I used for a specific project. However, the world of DSLR video is so new to me I am finding it useful to keep notes of the whole process to look back upon later.

Disclaimer: I am not a videographer but a (very much) first-time DSLR video shooter recording my experiences from this, my first project, in my blog.

For the video segments I have shot so far (introductory scene and scene 2) I’ve used the Nikon D800E with a 24-70 f2.8 lens mounted on an old Manfrotto 055XPROB tripod with a Manfrotto 701HDV Professional Mini Fluid Video Head which had been languishing upstairs for over four years according to my Amazon account. I’ve no idea why I bought it but am pleased to have it now.  The clip below is an initial idea for the opening sequence – I probably won’t use it for this project although it may well be used in a future video.

I also own a Nikon D750 and subsequent research suggests this is actually better for video than the D800E so for the next scenes I shoot (slated for 16th August) I am going to give the D750 a try.  The 055XPROB is an old favourite and whilst heavy (remember this whole project is being shot on foot) it gives me a good working height at full extension and also allows for me to use it reasonably close to ground level. The 701HDV head was a revelation. I’ve tried panning and tilting in the past with standard pan and tilt heads but the difference in ease of use and the smoothness of the pan from the dedicated video head is immense.  I’ve read reviews that describe this, now discontinued I believe, head as “buttery smooth” and totally understand what they mean.

I shot some test footage in the river with a handheld GoPro session video camera. The footage doesn’t look out of place when used as a short insert and I have some ideas to use this for future scenes. I am also going to dig out and charge up the Nikon Coolpix AW110 that I bought five years ago for a seaside holiday with the grandchildren to enable me to capture some stills from a different perspective.

For location and ambient sound I have used a RØDE VideoMic stereo on-camera microphone fitted to the camera hotshot and plugged into the camera.  This has proved adequate for the footage I’ve shot so far however I am also conscious that the pre-amps in DSLRs are not the best and so I’ve done a lot of research; copious reading and countless YouTube videos. After a lot of internal debate and deliberation I have ordered a TASCAM DR60D-MKII portable recorder which will considerably improve the audio quality and give me a good platform for future projects. The battery life is inferior to the Zoom series I am reading  but the Tascam is built with DSLR shooters in mind and looks far more intuitive to use for me than the Zoom equivalent I also considered.

For the voiceover I am currently using the Zoom H2n portable recorder which I’ve owned for some time now. I have previously used it to capture ambient sound for slideshows and narration for the video diaries I produced when studying.  It has built in microphones but for the voiceover for this project I’ve been using an old microphone that I probably bought in Tandy around fourteen years ago for a school project of one of my daughters.  It works but upon reflection I can’t say I’m totally happy with the quality; usable but could be a lot better I think*. I’m currently looking at the Samson Q2U USB/XLR microphone which has some great reviews and is reasonably priced too.  I will probably order that today and I strongly suspect that I will re-record all of the voice-overs before the end of the project – more on that in a future post I’m sure.

The H2n fits easily in the hand and is readily pocketable so can also be used to capture ambient sound for which I usually mount it on a mini tripod. I used this approach to record the audio of my footsteps on the doorstep and the door closing in the introductory scene for example. Given its portability it would make an ideal travel recorder for the traveller who wants to cut down on the size and weight of their kit.

Summary of kit used to date:

  • Nikon D800E/Nikon D750 (video and stills)
  • Nikkor 24-70 f2.8 lens
  • Fuji X-T10 (stills)
  • Fujinon 35mm f1.4 lens
  • Canon EOS M3 (stills) [I no longer have this camera]
  • GoPro Session
  • Manfrotto 055XPROB tripod
  • Manfrotto 701HDV fluid head
  • Manfrotto mini tripod
  • Rode VideoMic
  • Zoom H2n

I read somewhere that your first video will be shocking so just get it done and move on. I thought it rather negative when I first read it but given everything I’ve learnt already I can see more than a couple of grains of truth in this sentiment.

* No names, no pack drill but I saw one of these for sale on eBay recently and the seller had asked for “£5 or if you live close enough to me a pint of beer …”

Baby steps with audio

I mentioned in my last post that I have taken the plunge and started to work on my first ever DSLR video. My plan was to shoot, edit and produce the second segment of the planned video over the course of the last two days as a way of better understanding how each part of the process impacts the next. I have just finished this segment and the strategy paid dividends as I have learnt a lot and captured the learning on paper – real paper not the virtual kind!

This post captures the learnings with regard to audio, in particular to recording the narration. As part of my preparation I have been researching the various aspects of DSLR video making and it is every bit as involved as I’d imagined.  One factor that comes up time and time again though is audio; the quality of your audio can make or break a video.

Applying some of this research I used an external microphone to record directly to the cameras memory card whilst capturing the video footage rather than use the onboard microphone. Ideally I’d have an external device but I’m trying to work with what I have rather than investing in more kit.  A so-called dead cat on the microphone reduced wind noise and I was left with very usable ambient noise which I ran at reduced volume underneath all of the video elements of the final 55 second segment (above).

Following some further research this evening into synchronising sound I am in future going to record ambient sound with the microphone plugged into a stand alone recorder and not the camera. To be fair, the live-action audio requirements for this segment were very undemanding so part from the experience of attaching the microphone and adjusting levels there was little to be learned from this experience. Unlike recording the narration which did throw up some very useful pointers.

  • Building on the experience in the field I spent time getting the levels correctly adjusted before recording the voice over audio and it proved to be time well spent
  • I used a script and this proved invaluable in avoiding pregnant pauses and the inevitable “Uumms” and “Aaahhs” that I have realised pepper my day to day speech
  • With hindsight I should have recorded each of the narrative segments at the same time. Differences in background noise meant that the third clip, which I recorded separately from the first two, had a slightly different tone. The use of a script makes this easy to achieve too
  • Allow the recorder to run for a few seconds before starting to speak. This provides a useful clip of the background noise which can be used later when cleaning up the audio
  • After recording the first clip play it back using headphones to double-check the levels are correctly set
  • Take the clips into audio software (I used Audacity) for noise reduction and trimming to size ready for importing to the video project
  • When saving the clips use an appropriate name to make it easier to find when editing the video. Tracks labelled “zoom0003” are not particularly helpful. I used the first couple of words from each clip as a file name – e.g. “At first”, “Despite this”
  • Make a note of these file names against your script to make it much easier to select the correct one later.

Now, it has to be remembered that I only used 3 voice-over clips for this segment of the video so I’ve not tested my thoughts on a longer piece of work. However, I see no reason why this methodical approach shouldn’t also work with larger projects.

All in all I was very pleased with what I have learnt over the last 48 hours and I’m sure it is just the first small part of a much larger learning experience over the coming months.


Ouch!

My shoulders hurt!

Well, perhaps that’s an exaggeration but I took the D800E out yesterday and boy did I notice the weight difference compared to my Fuji kit.

I took a shoulder bag with the D800E and 24-70 f2.8 lens, a GoPro Session, mini tripod, Rode microphone, polariser and spare batteries. That’s all. Compared to what I’ve got used to recently it weighed a ton. I was also carrying an ancient Manfrotto tripod which was having its first public appearance for a couple of years.

I walked down to a spot on the River Calder close to my home to record footage for a current project. Yes. Moving footage – video! Moi!  I am working on a video entitled “My Patch” which will feature four or five locations that I regularly visit with a camera all of which are within walking distance of my front door. It will be my first foray into the video world and I am filming,narrating and processing the footage as well as overseeing all aspects of the production.

This trip was to film the footage for chapter two of the planned video which concerns said spot on the River Calder.  It was also an opportunity to test an idea I have for incorporating some GoPro footage (see below) into the final video.

I am currently putting together Chapter 2 and will post that on my blog later today I hope. My intention is to take Chapter 2 from planning, through filming, post production and finishing touches over the course of the weekend in order to gain the learnings for the other parts of the video.

Watch this space!