In my previous post I ended by saying I was off to put some 35mm colour film into a Mamiya RB67. Well, I wasn’t joking so here are the first three scans just to show I’m a man of my word. Once I’ve finished the scanning I will post a full update. A small spoiler though: my first attempt with the RB67 produced 10 negatives, but I managed 13 on the first roll of colour and 14 on the second.
So, having scratched the itch, I also successfully tried the 35mm-in-120 project with the 6×6 Bronica SQ-A which gave a negative 1.5cm longer than the ETRS. I was still forgetting on occasion though that horizontal and vertical are reversed because of the way the film is loaded onto the Bronica back, resulting in some odd compositions. Then I had another thought (awful habit, must stop doing this thinking malarkey) the film back of the Mamiya RB67 runs in the conventional 35mm manner, lengthways, and the film back itself can be rotated to shoot the 6×7 frames in vertical format. The itch flared up again!
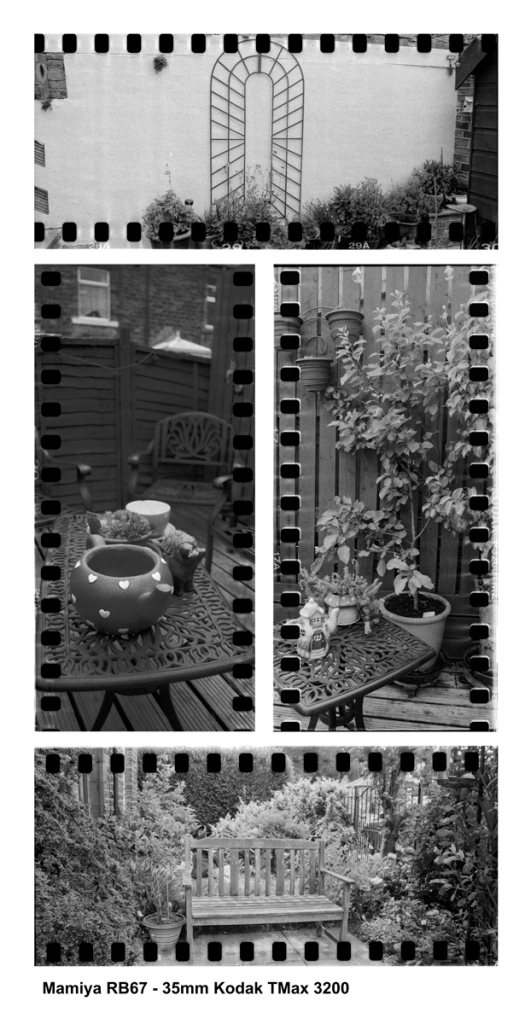
Spoiler alert: it worked! Mamiya RB67, 50mm lens and out of date 35mm Kodak TMax 3200
So, despite saying that this was to be a project that I picked up very occasionally, I found myself loading 35mm film into the somewhat larger film back of my Mamiya RB67. One thing to note however. The RB67 film back did not detect the presence of a film and so the first time I tried this I ended up winding the entire 35mm roll onto the 120 spool without shooting a frame. So, out with the changing bag and I removed the now unwound film from the back and rewound it into the original cassette. The solution was the multi-exposure mode of the RB67. In normal use this enables the shutter to be cocked without winding on the film thus allowing multiple exposures on a single frame but I found that by leaving the camera in multi-exposure mode I could still wind the film through without a problem. The longer throw of the 6×7 mechanism means a bigger gap between frames and potentially more waste but I still managed ten shots by attaching the leader of the 35mm film to an eleven inch strip of 120 backing paper to reduce wastage at the start of the film.
The film still needs to be removed in a changing bag (I transfer it straight onto a reel and store it in the developing tank) but that is still only a minor issue especially when shooting at home! I cannot envisage this being something I would spend a whole day doing but if I did for any reason the changing bag is light enough to tuck into a corner of my rucksack.
35mm Kodak TMax 3200 shot using a medium format Mamiya RB67 with 50mm lens. Handheld (test roll) at 250th sec and 400th sec. Aperures f5.6 / f8. Shot and developed 23/5/2020 (ref 2020/063)
No one needs to read an account of loading the film, shooting the images (the rotating back on the RB67 and the horizontal orientation of the film were a huge help) or processing the negatives. The first thing I noticed however when removing the processed film from the tank was the bigger spacing, but then the length of each negative struck me. It’s only 1cm longer, but that is an increase of 1/6, almost 17% longer than the 6×6 negatives and over 50% longer than those from the 6×4.5 film back in the Bronica ETRS.
The negatives were scanned using my old Epson V550 flatbed scanner and the Vuescan software. Rather than lay the negatives flat on the glass as before I used a Lomography Digitaliza 35mm scanning mask to hold the negatives. The Digitaliza holds the negatives by the very edges leaving the sprocket holes revealed. I had read mixed reviews but thus far its proven to be effective and relatively fiddle-free. The loaded mask needs to be handled carefully as it is very easy to nudge the negative out of its magnetic grip – especially with a blast from a can of compressed air! I also varied my technique for converting the negatives into positives but that’s for another day.
Here’s to the next itch – I’m off to load a roll of colour 35mm into a RB67 film back!
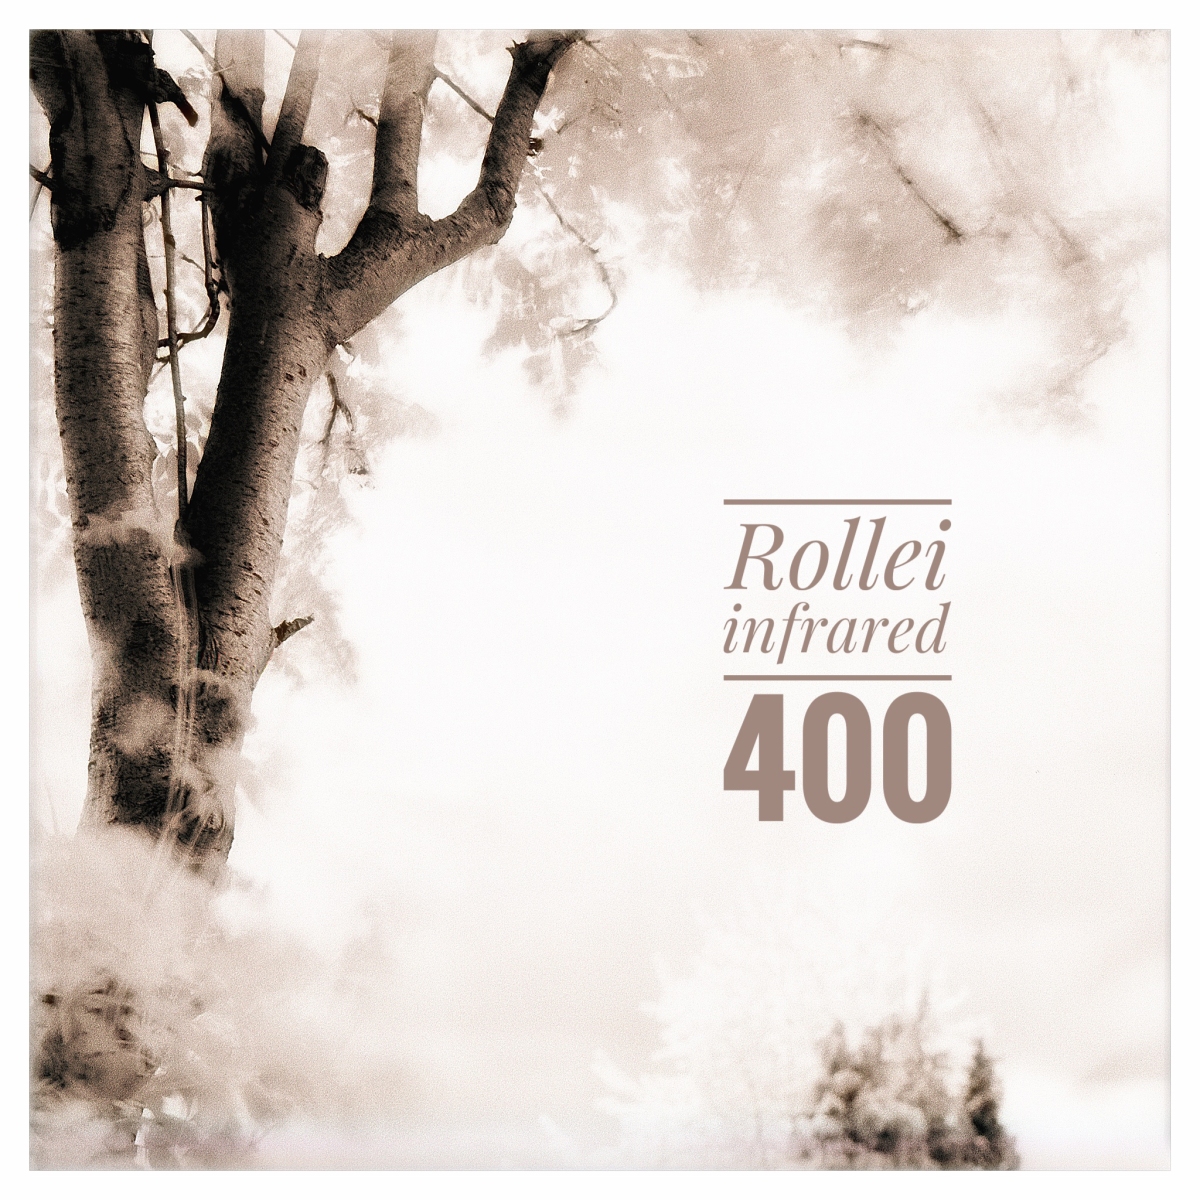
Back in January when I was stocking up with film for the Spring/Summer months I picked up a few single films of different stocks to my usual to try out as the opportunity arose. I think that in the back of my mind was that these would be used for something “special” or a specific project that took into account each film stocks particular properties or quirks. As an enthusiastic (digital) infrared photographer, I have an IR-converted Fuji X-T1, and so I picked up a couple of rolls of 120 Rollei Infrared 400 intending to use it whilst in Devon for a family wedding. Well, I’m consigned to barracks and in any event the wedding is postponed until 2021. So, the first roll, which I bought to test before using the second in “anger”, has now been exposed within the confines of my back yard.
Now before any one shouts I realise that Rollei INFRARED 400 is not a ‘true’ infrared film, but one with near-infrared sensitivity to about 820nm. I’m not going to quibble though and in any case this was about experimentation.
My weapon of choice for this experiment was a Bronica SQ-A, for no reason other than I like using it, plus the mirror lock-up would be useful. The film was rated at 400 ISO per the box and I shot a couple of frames without any filtration at this speed. I then attached a 720nm infrared filter and based on what I had been reading metered the scene at 12 ISO, an increase in exposure of five stops. Finally, I developed the film in Rodinal (1+25) at 20°C.
Contrary to some reports I’ve seen elsewhere on the web, the film went onto the reel very easily with no obvious curl to the acetate.
So, to the pictures. My first impression on hanging the roll of negatives to dry was how sharp and crisp they were. Some were clearly over-exposed but as I kept detailed notes that will enable me to learn from these. Popping the dry negatives on the light pad was an exciting moment as it was then I saw just how successful the experiment had been.
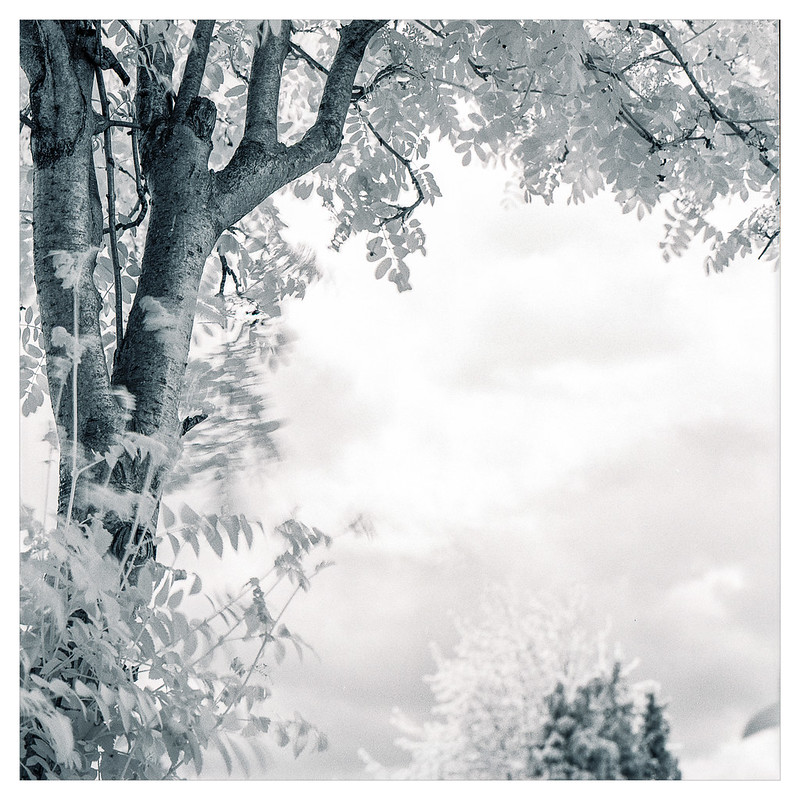
The first three frames (see above) had been taken with no filter, a polarising filter and lastly a 720nm infrared filter that I use with a full-spectrum Fuji X-T1. Just looking at the negatives I could see the dramatic differences between the first and third negative; even the negative has an ethereal feel. The third of these frames is shown, fully processed, below.
Great definition in the clouds from the infrared film. Bronica SQ-A 150mm lens Rollei infrared 400 film 720nm filter 1/4 sec f16. Developed in Rodinal (1+25)A typicsl IR scene – green foliage turning white whereas the table and other fittings are rendered more “normally”
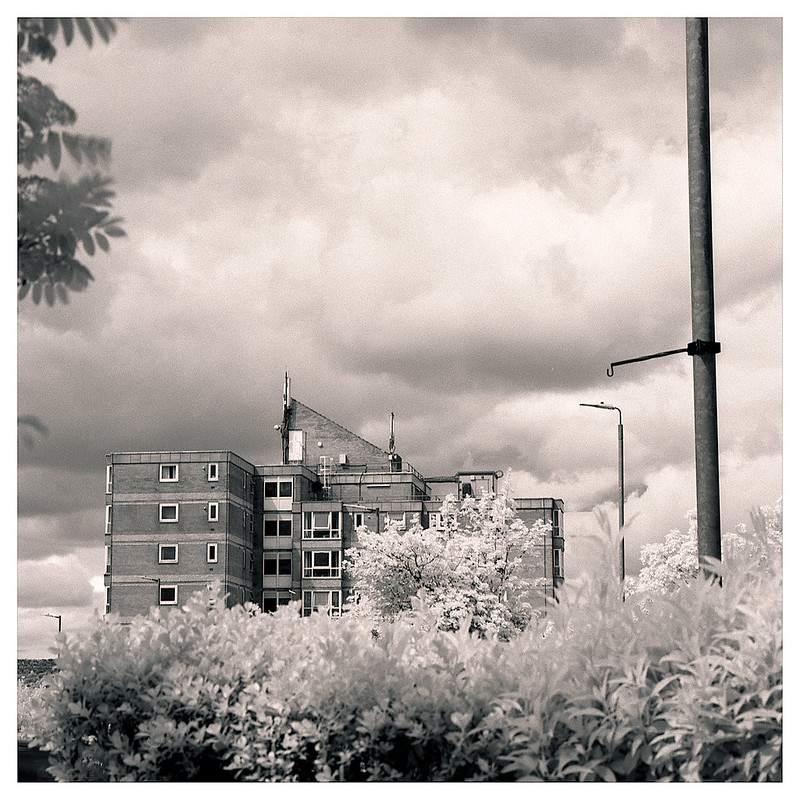
So, what did I make of this quirky film? Well, I have to admit that I was predisposed to the idea as I’ve shot a lot of infrared on my digital cameras as can be seen on my FLICKR account. What I wasn’t prepared for was how much I liked these simple front/back yard images. They add a whole new dimension to the portfolio of images I’m creating during the Lockdown. The day I chose was cloudy with sunny intervals and not the full-on sunny day with blue skies I had hoped for but I love the feel of these images nevertheless.
Bronica SQ-A 150mm lens Rollei infrared 400 film 720nm filter – and a blue tone in post-processing
So, what special project will the other roll be saved for? It is simply being saved for the next sunny day here in my back yard. I want to see what effect blue skies will have and can’t wait until I finally get released from the house. Never fear though as I’ve ordered another five rolls to keep on hand for when I do get back out with the camera!
Just an appetiser for a forthcoming blog post. I shot and processed the film this afternoon and scanned it this evening. Bronica SQ-A with Rollei infrared 400 film.
When you‘ve got an itch – you’ve gotta scratch it!
Sometimes an idea pops into the head and the only way to get it out again is to stop what you are doing and attend to it. It happened to me last Sunday, and by 7pm, just as I was about to settle down with a book for the evening, the itch became unbearable. So, I grabbed my Bronica ETRS, the 220 film back that I’d purchased in error and a roll of expired 35mm B&W film and headed into the garden. By 7.30pm I was mixing chemicals and by 8pm the still-wet negatives were hanging in my bathroom to dry.
So, what got me so motivated? And surely that’s a typo – 220 back and 35mm film?
The idea of putting 35mm film through a medium format film camera is hardly new or innovative but it’s been niggling away at the back of my mind for a while now and I’ve been itching to try it for myself. I’ve seen a handful of images online and even watched a couple of YouTube videos on the subject so I did have some thoughts on how to approach it. So long as it is loaded carefully into a medium format film back, it is possible to shoot images that extend across the sprocket holes of the 35mm film to cover the whole surface of the film and with my ETRS back you get 45x33mm negatives, including the sprocket holes. If I was to do the same with my SQ-A then the negatives would be around 60x33mm although I’ve yet to try this. I say careful incidentally because you need to ensure the film runs centrally down the film plate as you wind on if you want to be reasonably certain of your compositions.
Spoiler alert: this experiment with the ETRS worked and I’ve already loaded the ETRS 220 back with a roll of 35mm colour negative film for a more “serious” session – when the sun decides to reappear.
I chose the 220 film back as it was designed for longer rolls of medium format film which allowed for 30 shots on the ETRS so I would not be advancing the film back past the number of shots the 35mm film would provide. There is however a lot of wasted film at the start of the roll due to the way the Bronica winds on the 120 film at the start of a roll, the back is designed for roll film and needs to pull sufficient backing paper through to reveal the film buried inside the roll. I did however manage 21 exposures on this 36 exposure test roll (remember this is a 6×4.5 back and not 6×6 so if using a 6×6 format camera the number of images obtained will be less although they will be wider). I could try sticking a length of old backing paper to the start of the 35mm film I guess to minimise this wastage but that is an idea for another day.
Out of date Ilford HP5+ 35mm film in a Bronica ETRS 220 film back
As the image above shows the idea worked and the subject is lined-up correctly and not sloping due to wonky film loading. So what did I learn?
Vertical = horizontal and horizontal = vertical!
As the picture of the loaded film back shows, first and foremost: vertical = horizontal and horizontal = vertical! The film in a Bronica ETRS back runs top to bottom unlike a 35mm SLR where it runs left to right. Which means the 35mm film inside the 220 back is running down the middle rather than width-ways. It takes some getting used to, and I may cut a mask for the viewfinder to remind me, but basically when holding the camera normally the film is covering a vertical strip down the middle of the viewfinder. Tip the camera on its side (as you would normally to shoot a portrait or vertically orientated image) and the strip now runs horizontally across the middle of the frame.
That aside, and I have a lot of spoilt images because I hadn’t noted that quirk earlier, everything else went well. I used a pair of adaptors on the 35mm cassette which enabled me to insert the film in the same way I would have inserted a 120 roll. In a traditional film camera the 35mm film is loaded with the glossy side towards you but as the emulsion is on the other side of the plastic strip you need to reverse this when loading 35mm film into a roll film back (see above); basically the emulsion (non-glossy) side needs to be foremost in the holder so it is exposed to the lens when the film back is attached to the camera and the slide removed.
This quick and impulsive test was in most respects successful. Yes, every frame is orientated in the opposite direction to that in which I shot it and so many do not make compositional sense but this was not about creating masterpieces but about seeing if I could make it work – and I did. The first few frames were horribly under-exposed as the light meter I was using was still set to 800 ISO from an earlier session and I had also chosen to underexpose by a couple of stops, partly to give a darker frame to the main subject but mainly to achieve a shutter speed at which I could handhold the camera.
There were a couple of images however where, by dint of the 40mm lens I was using, the subject was centrally placed and therefore the composition does still work. Sadly, they were also amongst the first few underexposed frames but I have salvaged one of Grandson Harry which gives an idea of the kind of image I was hoping to capture.
Like many of these techniques, this one is unlikely to become my go-to method of shooting and needs to be used sparingly if it is not to become cliched and, dare I say, a little boring. The occasional 35mm cassette for a bit of fun is all I expect to be exposing in this manner. That said, I have ordered a 220 film back for my 6×6 Bronica SQ-A so I can try out the larger format. I’m hoping to shoot some panoramic images of the rooftops opposite for a sub-project within my main 366 project. There is also a roll of 35mm colour negative film in the ETRS 220 back .
So, as has been said countless times before – watch this space!
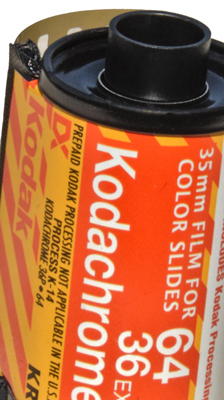
The first film I ever shot consistently was probably Kodak Tri-X, back in the 1970s and I can remember that my teenage photography was very mono-centric. Sadly, there are very few negatives surviving from that time but most are Kodak Tri-X although there’s a fair smattering of Ilford HP5 too. Colour was very much a “treat” and I vaguely recall that a roll of Kodachrome 64 (I found K25 too limiting) was almost a months pocket money.
I stuck with black and white initially therefore for two reasons. Firstly, and most importantly I guess, was the relative cost of black & white versus colour. Secondly, was the practicalities of developing in my Mum’s kitchen. With a changing bag and a few inexpensive items a roll of Tri-X could be developed just as easily then as it can now. Within a few hours I could get a look at my negatives and see which of my experiments had worked, whilst the shooting of them was still fresh in my mind. Kodachrome took ten days at least from leaving me to its return and whilst there were some nice results it was a very costly way of working especially as I was still finding my way with the hobby. No internet or YouTube in those days to show me how to do it or cut down the time taken to figure things out. There was a lot of wasted film at the start and a lot of disappointment.
Looking back through the material that has survived there are very few colour prints and those that we have tend to be snap shots of days out with the family. I’ve never really shot colour negative film it seems.
Fast forward to 2018 and my decision to return to film photography. You would have thought I would immediately return to the old faithful Kodak Tri-X. Well, I thought so too until I popped in to the local camera shop and saw the retail price differential between Kodak and Ilford at that time. I had shot Ilford HP5 occasionally “back in the day” and once again it was economics that drove the choice of film stock as I left the shop with a stash of HP5. Black and white again you will notice, I don’t think I ever seriously considered colour film at the time although over the last two or three years I have shot a handful of rolls of Kodak Ektachrome and Fuji Velvia.
Press the fast-forward button again to early 2020 (pre-pandemic) and I’m edging away from 35mm film towards medium format film and also starting to investigate the range of weird and often wacky film stocks now available alongside the traditional staples. I ordered a brick of Ilford HP5 recently but in order to get my moneys worth on the fixed P&P costs I also picked up a handful of single rolls of these more esoteric offerings. As an aside, my film drawer has never been so full; there’s currently around forty rolls of 120 in the drawer. However, when I look at the boxes lined up … Ilford FP4, HP5, PanF+, some Fomapan, a handful of single rolls of “ones to try” … but not a single roll of colour amongst them.
Bronica ETRS 75mm lens with +4 close-up filter f5.6 1/125th second Fuji colour Pro160NS
A few months back a friend of mine gave me a bag of out of date film and amongst these were half a dozen rolls of Fujicolor Reala. The film expired around 18 years ago but it would be rude not to use it so I rated it at 50 ISO (box speed 100) and put a few rolls through various medium format cameras. Sitting with half a dozen rolls of exposed film I then looked in to processing and scanning options. Blimey! I’ve home developed black and white for a long, long time so hadn’t kept up with commercial processing costs but it quickly occurred to me that perhaps now was the time to learn how to home process colour negatives! So, long story short, and I’ve not written about this properly yet, but back in February I started home processing colour too. Almost twenty rolls on and I’ve used up all the out of date colour negative film I had been given plus various odd rolls of film I bought as singletons to have a play with. I’m no expert but I’m producing consistently decent results so now is probably a good time to consider shooting more colour which then leads to the question – but which one?
I had thought that finding the right colour film would be simpler in these days of YouTube and Google. But not so. I found some examples shot with Lomography 800 and thought this would be worth trying myself. I didn’t particularly like the results I achieved during a walk along the canal however and as I delved further into this colourful world I realised that the “look” of a film nowadays was as much influenced by the photographers use of scanning and post-processing software as it was on the film stock or developer choice. I found that by playing on the computer I could get similar results from the Lomography 800 that I’d seen online, and more suited to my taste, but that to me defeats the purpose. I am trying to reduce my time spent post-processing on the computer not increase it and add in the additional step of processing film too!
Mamiya C3, 180mm lens, Lomography 800 colour negative film. 6th February 2020 – Elland Lock. Tastes vary!!
So, it seems that despite the benefits of the Internet-age I shall be returning to the methods I employed in the 1970s in choosing the colour film stock I will be using moving forward: cost and trial and error. I’ve just ordered five rolls of Fujifilm Pro 400H as the starting point; the price point is palatable and talking to a fellow film shooter who eschews computer post-production, the 400H has, in his experience, a fairly neutral tone particularly in the shadows. However, one thing I’ve learnt over the decades is that tastes in film stock are very personal. Once I’ve shot and developed these five rolls I will know if it’s for me or if I need to look further. Sadly, I will only be shooting in the garden and not down by the river or canal but I will have to make the best of what I have.
Fast forward once again to Lockdown Britain. As it was thus with Tri-X – I tried it, I liked it and looked no further until the price became such that a rethink was needed. Forty plus years later will history repeat itself and I standardise on the first colour negative film I try as I did with black and white all those years ago?
Nikon FM2n with out of date Rollei Retro 100 shot at box speed and developed in Rodinal (1+50)
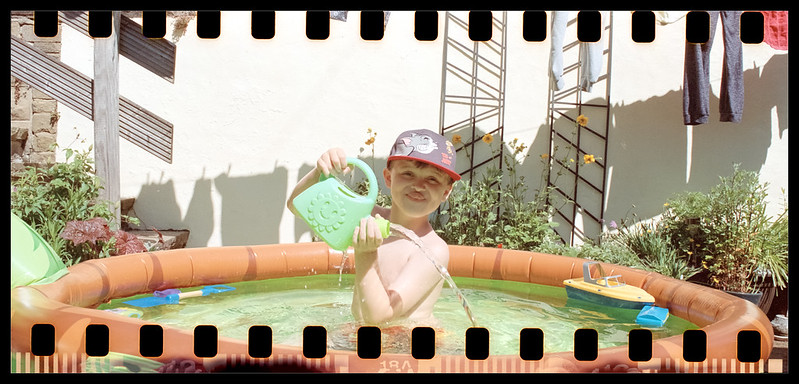
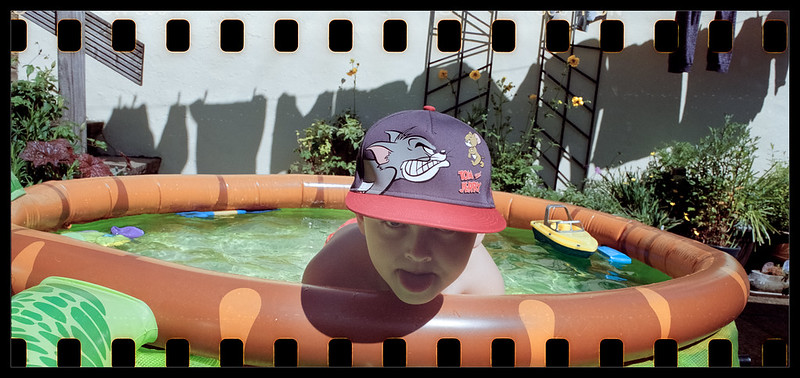
It’s not often I shoot 35mm film these days despite a drawer full of film and twenty-plus 35mm cameras to chose from. However, on a whim, I picked up the Nikon FM2n over the weekend and noticed it had a part exposed roll of film in. It was also fitted with a 24-70 zoom lens I had been sent aa while back but not yet tested so I decided to finish the roll.
Nothing formal however, the live-in grandsons were playing in the back yard, in and out of their paddling pool, so I took a few snaps of them first. When they saw what I was doing they both wanted a go too, so that used a few more frames. Harry then decided to pose; composing a fast-moving, naked subject so as to preserve everyone’s modesty was a challenge. That the lens was manual focus with a sloppy focus ring just added to the fun!
Reaching the end of the roll I decided that, as everyone was outside and the kitchen therefore empty , this would be a good time to develop the film and see what I had. The first surprise was that I had loaded Rollei Retro 100 in the camera. Why that had been so I couldn’t decide and having now seen what the first few frames were I still don’t know why I had a 100 speed film in the camera. I’ve been using Perceptol a lot recently, mainly because I’ve been shooting mainly Ilford PanF+ and FP4+ in my Bronica ETRS but reached for the Rodinal, mainly because I wouldn’t have to make up a new batch of Perceptol rather than any aesthetic choice on this occasion.
After consulting my notes I settled on 13 minutes at 20 degrees C in Rodinal diluted 1+50. The result was, as expected, good negatives with a reasonable amount of contrast. I left them hanging to dry in the bathroom and later in the day cut and sleeved them ready for a proper look on the light pad the following day.
As soon as I placed the first strip on the light pad I knew that all was not well. I had a good range of tones and the negatives were not overly contrasty so I was confident that they would print well in the darkroom. They also scanned well it turned out. Even from inspecting the negatives however, I could see immediately that the lens was, to say the least, a little “soft”. Excluding the frames ruined by camera shake (due to the low shutter speeds the 100 film required) and the erratic mobility of my subjects, very few of the images were the crisp, sharply focused negatives I had expected. That was disappointing especially as there appeared to be some nice images at the first glance of the still-wet negatives the afternoon before. But not the fault of the film.
Thumbs up!
So, frustrations with the now-discarded lens aside, what did I make of the out of date Rollei Retro 100 (also known as Agfa APX 100)?
Despite the film being out of date, I made no compensation in respect of exposure, mainly because I didn’t know what film was in the camera and the ISO dial was set to what I realised afterwards was box speed. I liked the “look” of the images from the film, although defining “look” is a futile exercise as it will vary from person to person. The grain is very apparent in these negatives but I don’t mind that at all; as someone who used to regularly shoot Kodak Tri-X at 6400 ISO in the 1970s I’m used to a bit of grain! Purely digital shooters with no history of working with film will probably be horrified at all the “noise” however.
It‘s a thumbs up therefore from me. I shoot mainly 120 film and my emulsions of choice are Ilford PanF+ and HP5 but I would not be averse to putting a roll or two through the Bronicas if the subject was right.
I wanted to see if the Bronica ETRS could be used as a P&S relying on the prism to set the shutter speed. This would make it easier when shooting family snaps such as these. Whilst I prefer the 6×6 format for most of my “serious” photography I am finding the 6×4.5 format of the ETRS works ideally for this type of “informal” photography.
Bronica ETRS with 250mm – a family snapper point and shoot?
Above: Frames 9 – 12 from a roll of HP5+ shot using a Bronica ETRS with a 250mm lens and relying on the AEII metered prism for correct exposure. I set the speed to 400 and aperture to f5.6 and left the prism to set the shutter speed.The film was processed in Rodinal (1+50).
Brrrrrr!.
Looking at the strip of negatives hanging up to dry I thought that and overall it had worked and this was confirmed when I scanned them on my Epson Perfection V550. To include the rebate I needed to lay the negative directly onto the scanner glass but I seem to have got away with no obvious moire patterns so it was probably my lucky day.
It was mid-morning on Wednesday 18th March that I received the not-unexpected call from my consultant – please stay home for your own safety. It was an instruction dressed up as a suggestion/recommendation. She conceded that I could use my back yard for fresh air but insisted that this should be my boundary until further notice. Like so many others with medical conditions that make them particularly vulnerable to Covid-19 I was in Lockdown before the phrase had been uttered by HM government. When Lockdown officially started and with it the concession of an hours exercise a day I got in touch with my consultant; again, I was not in the least surprised to be given a firm “No”, so I was resigned to stay at home until 14th June at least– ironically Amanda’s birthday and the day after our 39th wedding anniversary.
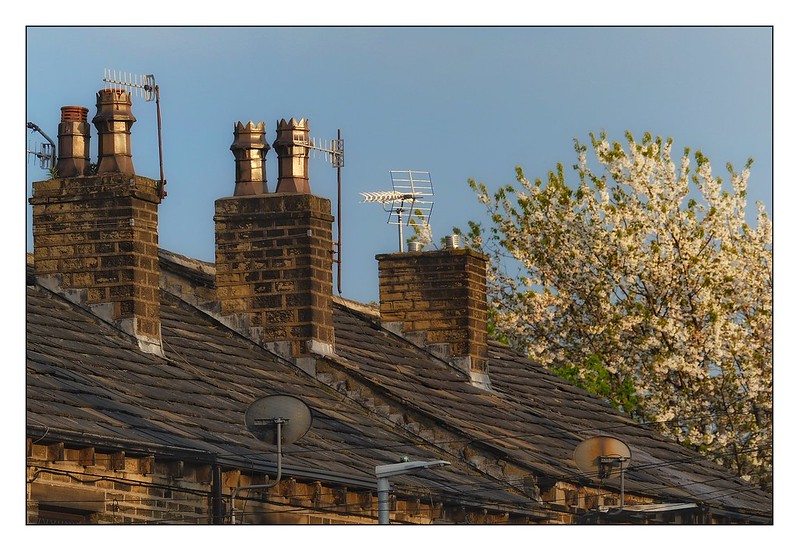
Even when I have managed a slightly more urban-looking subject I’ve chosen colour!
From the start I was determined to keep my 366 Project going. This might be Lockdown but I was determined it would not be a shutdown photographically. As of today, 9th May 2020, I am 923 days into my long-term picture-a-day challenge, and I was not going to let this “inconvenience” stop me from going past the 1,000-day mark; my eyes are still firmly fixed on the end of July! I had recently been producing a lot of urban black and white images, many from around the small town where I live, and these had become a trademark of sorts, but I would need to reconsider this strategy. Looking back there was definitely a strong bias away from colour. We only have a small back yard and a tiny front yard (three metres from the front door to the public footpath – I measured it) so it was going to be challenging.
So how am I doing? Well, fifty-plus days into isolation (shielding, or whatever today’s name is) and I’ve not only kept the challenge going without having to resort to pictures of my dinner, I have also posted an additional 120+ Random Images from Isolationand it is these that I have drawn on for this post.
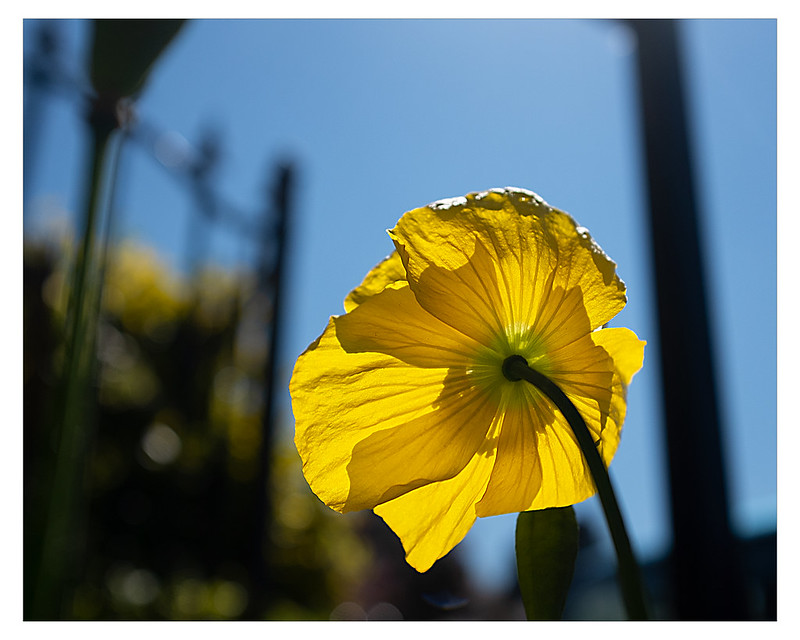
Poppies have often featured in the past
I have continued to use a range of cameras for the 366, including my film cameras, and the iPhone has only featured a couple of times in my daily posts so that aspect of the challenge is unchanged from pre-Lockdown. My cameras live under the coffee table next to my armchair at the moment however which I never got away with prior to isolation. The only major change from my workflow is that most images have been post-processed using the Snapseed App on my iPad rather than Photoshop as I’ve used my Mac only occasionally during this period for some reason I’ve yet to fathom.


You must be logged in to post a comment.